
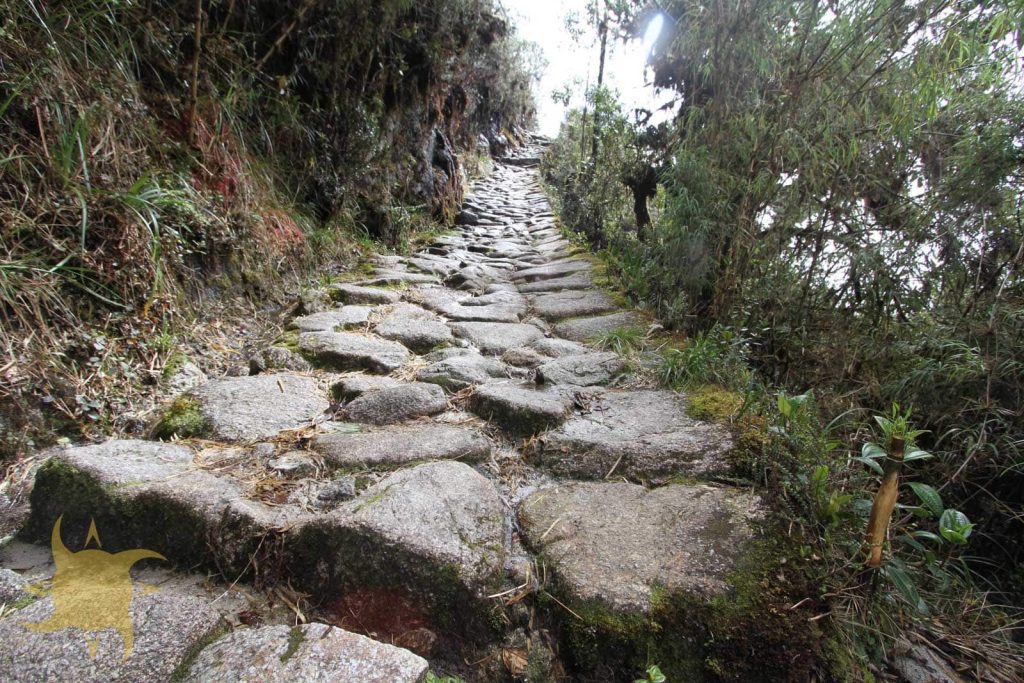
Introduction
The Inca Trail to Machu Picchu is one of the world’s best-known treks, and one of the safest when approached with proper preparation. But “safe” doesn’t mean risk-free. Between altitude reaching 4,215 meters (13,828 feet), steep Inca staircases descending into cloud forests, and remote locations hours from medical facilities, understanding potential health risks and prevention strategies is essential.
Here are the numbers: approximately 2-3 fatalities occur annually on the Inca Trail out of 40,000+ trekkers (0.005-0.0075% fatality rate). An additional 12-15% experience minor injuries like blisters or sprains, 2-3% require medical evaluation for moderate injuries, and less than 0.5% need emergency evacuation. Over 80% of these incidents are preventable through proper preparation, appropriate gear, and understanding warning signs.
This guide focuses on what most Inca Trail content skips: when a medical emergency actually requires evacuation, what that evacuation looks like in practice (methods, timelines, real costs), which pre-existing conditions need medical clearance before you book, and the travel insurance coverage evacuation requires. For the broader trek overview, see our Inca Trail guide; for altitude sickness and fitness training specifically, the dedicated guides linked throughout this page go deeper than the summaries here.
Quick Answer: The Inca Trail is statistically safe with a 99.99% completion rate without serious incident, but proper preparation is essential. Key health considerations include altitude acclimatization (spend 2-3 days in Cusco before trekking), physical training (12 weeks recommended), appropriate footwear (broken-in hiking boots), travel insurance with evacuation coverage ($100,000+ recommended for high-altitude/remote trekking), and pre-trek medical screening for ages 50+ or those with cardiac/respiratory conditions. Most injuries are minor and preventable through proper technique and pacing.
Table of Contents
- Honest Risk Assessment: Understanding Real Statistics
- Altitude Sickness: Prevention, Recognition & Treatment
- Common Injuries & Evidence-Based Prevention
- Physical Fitness Requirements & Training Program
- Pre-Existing Medical Conditions & Screening
- Essential Gear for Safety & Injury Prevention
- Trail Hazards by Section: KM-by-KM Guide
- On-Trail Safety Protocols & Daily Routines
- First Aid Protocols for Common Situations
- Emergency Evacuation Procedures
- Guide Medical Qualifications & Equipment
- Travel Insurance Requirements & Coverage
- Vaccinations & Health Documentation
Honest Risk Assessment: Understanding Real Statistics
The Reality of Inca Trail Safety
Generic reassurances like “perfectly safe” or “safe if you follow guidelines” don’t help you make informed decisions. Based on our trek records since 2006 and Peruvian Ministry of Culture incident reports, here is what the risks look like.
By the Numbers: Inca Trail Safety Statistics (2015-2024)
- Annual trekkers: 40,000-50,000 (pre-pandemic levels restored)
- Fatality rate: 2-3 per year (0.005-0.0075% of trekkers)
- Minor injuries: 12-15% (blisters, minor sprains, altitude discomfort)
- Moderate injuries: 2-3% (requiring medical evaluation, possible evacuation)
- Serious injuries/emergencies: <0.5% (fractures, severe altitude sickness, cardiac events)
- Completion rate: 99.5% (most non-completions due to altitude sickness, not injuries)
Causes of Serious Incidents
Understanding what actually causes accidents helps you prevent them:
Fatalities (2-3 annually, causes breakdown):
- Cardiac events (40%): Undiagnosed heart conditions exacerbated by altitude and exertion
- Falls (30%): Slips on wet sections, missteps on steep descents
- Landslides (20%): Weather-related terrain collapse, primarily during rainy season
- Altitude complications (10%): High Altitude Cerebral Edema (HACE) or Pulmonary Edema (HAPE) in rare cases
Serious Injuries Requiring Evacuation (<0.5% of trekkers):
- Fractures (ankles, wrists from falls)
- Severe altitude sickness (HACE/HAPE symptoms)
- Cardiac symptoms (chest pain, irregular heartbeat)
- Severe dehydration requiring IV fluids
- Hypothermia (inadequate clothing/gear)
Pro Tip: The most dangerous misconception is that the Inca Trail is “just hiking.” The combination of high altitude, steep terrain, and remote location creates genuine risks, but ones that are manageable with proper preparation and respect for the environment.
Risk Stratification: Who’s Most At Risk?
Our incident database reveals clear patterns by age, fitness level, and season:
Age-Related Risk Profile:
| Age Group | Injury Rate (per 1,000 trekkers) | Primary Risk Factors | Recommendations |
|---|---|---|---|
| 18-29 | 11 | Overconfidence, poor judgment, rushing | Pace discipline, follow guide instructions |
| 30-49 | 8 | Lowest risk group | Standard preparation adequate |
| 50-64 | 14 | Falls, cardiac screening needed | Medical clearance, focus on balance training |
| 65+ | 18 | Cardiac events, fall risk | Comprehensive medical screening, extended acclimatization |
Fitness Level Impact:
- Excellent fitness: 6 injuries per 1,000 trekkers
- Good fitness: 9 injuries per 1,000 trekkers
- Average fitness: 15 injuries per 1,000 trekkers
- Poor fitness: 28 injuries per 1,000 trekkers (not recommended)
Seasonal Risk Variation:
- Dry season (June-August): 7 injuries per 1,000 trekkers
- Shoulder season (April-May, Sept-Oct): 10 injuries per 1,000 trekkers
- Rainy season (November-January): 18 injuries per 1,000 trekkers
- Peak risk month: January (trail conditions deteriorate, February closure follows)
Important: Age and fitness aren’t barriers. We’ve guided trekkers from ages 12 to 78. The key is honest self-assessment, appropriate medical clearance, and proper preparation matched to your risk profile.
What Makes the Inca Trail Uniquely Challenging?
Understanding specific hazards helps frame your preparation:
- Altitude: Trekking continuously above 2,400m (7,874 ft), peaking at 4,215m (13,828 ft) at Dead Woman’s Pass (Warmiwañusca)
- Remote location: Furthest point from road access is 6-8 hours by porter stretcher
- Technical terrain: Uneven Inca steps, exposed sections, steep ascents and descents
- Weather variability: Conditions can change rapidly, even in dry season
- Multi-day exertion: Cumulative fatigue over 4 days affects judgment and coordination
Altitude Sickness: Prevention, Recognition & Treatment
Altitude sickness is the single biggest health risk on the Inca Trail. Dead Woman’s Pass tops out at 4,215m, and most trekkers arrive from near sea level with only a day or two of Cusco acclimatization. Mild symptoms (headache, fatigue, nausea) affect an estimated 30-50% of trekkers; severe HAPE/HACE requiring evacuation is rare (under 1%) with proper acclimatization. Diamox (acetazolamide) is the standard prevention medication, hydration and a slow ascent pace are the other two pillars of prevention, and severe symptoms always mean immediate descent, no exceptions.
For full dosing protocols, symptom recognition by severity, Cusco acclimatization strategy, and a complete Diamox decision framework, see our dedicated Altitude Sickness in Peru guide.
Common Injuries & Evidence-Based Prevention
Based on our own injury records, here are the most frequent injuries, their causes, and proven prevention strategies.
Injury Statistics by Type
| Injury Type | Incidence Rate | Primary Cause | Prevention Success Rate |
|---|---|---|---|
| Blisters | 8-10% | Improper footwear, wet socks | 90% preventable |
| Ankle sprains | 3-4% | Uneven terrain, fatigue | 60% preventable |
| Knee pain | 5-7% | Steep descents, inadequate conditioning | 70% preventable |
| Falls (minor) | 2-3% | Wet conditions, poor technique | 75% preventable |
| Dehydration | 4-6% | Inadequate fluid intake | 95% preventable |
| Gastrointestinal | 3-5% | Food/water contamination | 80% preventable |
1. Blisters: Prevention & Treatment
Causes:
- Friction from new/poorly fitted boots
- Wet socks (sweat or rain)
- Inadequate break-in period
- Poor sock selection
Evidence-Based Prevention:
Boot preparation (6-8 weeks before trek):
- Break in boots with 50+ km of walking
- Include uphill/downhill terrain, weighted pack
- Identify pressure points, adjust lacing
- Replace boots if persistent hotspots remain
Sock strategy:
- Merino wool or synthetic blend (avoid cotton, which retains moisture)
- Liner sock + thicker hiking sock system
- Change socks at lunch break (pack 2 pairs daily)
- Powdered foot talc reduces moisture
Proactive taping:
- Apply medical tape or moleskin to known hotspot areas before hiking
- Common areas: heels, outer little toe, ball of foot, arch
- Carry extra tape/moleskin in day pack
On-trail monitoring:
- Address “hot spots” immediately (don’t wait for blister formation)
- Stop, remove boot, dry foot, apply protective tape
- Change to dry socks if wet
Treatment if blister forms:
- Small, intact blister: Leave unbroken, apply padded bandage
- Large, painful blister: Sterilize needle, drain from edge, leave skin intact, apply antibiotic ointment and bandage
- Torn/popped blister: Clean thoroughly, trim loose skin, antibiotic ointment, protective bandage
- Monitor for infection: Redness, warmth, pus, red streaking (requires medical attention)
2. Ankle Sprains: Biomechanics & Prevention
High-risk locations (25% of sprains occur here):
- KM 10-12: Steep ascent to Wayllabamba, loose rocks
- KM 22-24: Dead Woman’s Pass descent, narrow Inca steps
- KM 35-37: Intipata ruins approach, wet stone surfaces
Biomechanical risk factors:
- Ankle instability from previous sprains
- Fatigue (coordination decreases after 5+ hours hiking)
- Improper footwear (low-cut shoes lack ankle support)
- Heavy pack weight (center of gravity shifts)
- Inattention (looking at scenery, not trail)
Prevention strategies:
Footwear selection:
- Mid or high-top hiking boots (ankle support critical)
- Deep lug sole pattern (Vibram or equivalent)
- Firm ankle collar (not soft/flexible)
- Properly fitted (thumb width in front of toes with downhill pressure)
Proprioceptive training (8-12 weeks before trek):
- Single-leg balance exercises (30 seconds x 3 sets, each leg, daily)
- Progress to unstable surfaces (balance pad, wobble board)
- Incorporate into hiking training (trail running improves ankle stability)
Trekking pole technique:
- Use two poles (bilateral support)
- Plant poles ahead and to sides (creates tripod stability)
- Shorten poles for ascents, lengthen for descents
- Never “post” pole and lean full weight (pole can slip)
On-trail technique:
- Maintain 3-point contact on steep/uneven sections
- Look 2-3 steps ahead (anticipate foot placement)
- Slow pace on descents (this is when most sprains occur)
- Rest more frequently when fatigued (every 45 min minimum)
Pre-existing ankle instability:
- Prophylactic taping or lace-up ankle brace
- Extended warm-up before daily hiking
- Extra caution on uneven terrain
- Consider adding extra rest day at Wiñay Wayna
Treatment protocol (RICE + stabilization):
- Rest: Stop hiking, remove weight from ankle
- Ice: Cold water compress (no ice available on trail)
- Compression: Elastic wrap or tape (guide carries)
- Elevation: Elevate above heart when resting
- Stabilization: Tape or brace for support
- Evacuation decision: If unable to bear weight or severe swelling, evacuation required
3. Knee Pain: Descent Biomechanics
The Inca Trail’s steep descents place enormous stress on knees, particularly the 1,600-step descent from Phuyupatamarca to Wiñay Wayna on Day 3.
Why descents hurt knees:
- Each descending step generates force 5-8x body weight on lead knee
- Quadriceps eccentrically contract to control descent (causes micro-damage and inflammation)
- Fatigue reduces muscular shock absorption (bone and cartilage absorb more impact)
Evidence-based prevention:
Trekking pole technique (reduces knee load 25-30%):
- Lengthen poles 5-10cm for descents (shifts weight to arms)
- Plant both poles ahead of feet (never beside)
- Transfer weight to poles before stepping down
- Use wrist straps properly (weight through strap, not grip strength)
Descending technique:
- Take shorter steps (reduces impact force)
- Land with slight knee bend (avoid “locking” knee)
- Engage core muscles (upright posture, not leaning back)
- Side-step steep sections (distributes load across different muscle groups)
- Rest every 30 minutes (allow quadriceps to recover)
Pre-trek strength training (12-week program):
Weeks 1-4: Foundation
- Squats: 3 sets x 15 reps, bodyweight
- Lunges: 3 sets x 12 reps each leg
- Step-downs: 3 sets x 15 reps each leg (8-inch step)
Weeks 5-8: Progressive loading
- Weighted squats: 3 sets x 12 reps (25-50% bodyweight)
- Bulgarian split squats: 3 sets x 10 reps
- Single-leg deadlifts: 3 sets x 12 reps
Weeks 9-12: Specificity
- Weighted pack descents (start 10kg, progress to trek weight)
- Hill repeats (focus on controlled descent technique)
- Eccentric quad exercises (slow 5-second lowering phase)
Pro Tip: Practice descending with trekking poles before the trek. Many first-time pole users struggle with coordination, defeating their purpose. Master the technique on training hikes.
4. Falls: Risk Factors & Prevention
Statistical profile:
- 40% of falls occur among “fast hikers” rushing ahead of group
- 60% of falls occur on wet trails (rainy season concentration)
- 75% occur during descents (gravity + fatigue combination)
- 15% occur within 50m of photo-worthy locations (distraction factor)
Prevention strategies:
Group discipline:
- Never hike ahead of guide or behind sweep guide
- Buddy system (pairs stay together, watch each other)
- No solo photography stops without informing guide
Wet condition protocol:
- Shorten stride length
- Increase trekking pole usage
- Add rest breaks (fatigue compounds slippery conditions)
- Avoid steep shortcuts (stay on established trail)
Photography safety:
- Stop completely before taking photos
- Step away from trail edge
- Have hiking partner watch footing
- Save cliffside photos for designated viewpoints
Footwear traction:
- Clean boot treads daily (mud reduces grip)
- Check tread wear before trek (replace if worn smooth)
- Waterproof boots properly (water-saturated leather loses grip)
Physical Fitness Requirements & Training Program
Adequate physical fitness is the single most controllable factor for trek success and injury prevention. Here’s exactly what fitness level you need and how to achieve it.
12-Week Training Program
Build fitness in three phases over 12 weeks: base cardiovascular endurance and bodyweight strength (weeks 1-4), weighted-pack hiking with heavier strength work (weeks 5-8), then trek-specific conditioning with a 15kg pack and taper (weeks 9-12). The full week-by-week breakdown, with exact rep counts, hike distances, and pack weights for each phase, lives in our dedicated Inca Trail Training Guide, which also covers gym-free alternatives and what to do if you’re starting with less than 12 weeks.
Fitness Self-Assessment, Age Modifications & Mental Preparation
A pre-trek fitness self-assessment (endurance, strength, and multi-day tests), age-specific training modifications for trekkers 50+ and 60+, and mental-preparation techniques (exposure therapy for heights, stress inoculation, mindfulness) are covered in full in our dedicated Inca Trail Training Guide, alongside the week-by-week 12-week program above.
Pre-Existing Medical Conditions & Screening
Certain medical conditions require additional precautions, medical clearance, or may preclude trekking. Here’s honest guidance on common conditions.
Cardiac Conditions
Why high altitude poses cardiac risk:
- Heart rate increases 20-30% at altitude (to compensate for lower oxygen)
- Blood pressure rises (vasoconstriction response)
- Physical exertion adds additional cardiac demand
- Dehydration thickens blood (increases clot risk)
Conditions requiring cardiology clearance:
- Previous heart attack or cardiac procedure (angioplasty, stents, bypass)
- Arrhythmias (atrial fibrillation, ventricular tachycardia)
- Heart failure (any degree)
- Significant coronary artery disease
- Uncontrolled hypertension (>160/100)
- Family history of sudden cardiac death <50 years old
Recommended screening (ages 50+):
- Stress ECG (exercise cardiac stress test): Detects exercise-induced ischemia
- Echocardiogram: Assesses heart function, valve problems
- Blood pressure optimization: Control before trek (target <140/90)
On-trek cardiac precautions:
- Carry all cardiac medications in day pack (not porters’ duffel)
- Guide knows your condition and medication regimen
- Portable pulse oximeter (monitor oxygen saturation)
- Lower target pace (allow higher heart rate ceiling)
Absolute contraindications for trekking:
- Recent heart attack (<6 months without cardiac clearance)
- Unstable angina
- Severe heart failure (NYHA Class III-IV)
- Uncontrolled arrhythmias
Respiratory Conditions
Asthma:
- Mild/well-controlled asthma: Generally safe with precautions
- Moderate-severe asthma: Requires pulmonary function testing and physician approval
- Bring extra inhalers: Pack in day pack, not porter load
- Cold air trigger: Use scarf over mouth/nose in cold conditions
- Altitude consideration: Thin air can trigger bronchospasm, so practice using your rescue inhaler with guide
COPD (Chronic Obstructive Pulmonary Disease):
- Mild COPD (GOLD Grade 1-2): May be possible with oxygen supplementation and medical clearance
- Moderate-severe COPD: Generally not advised (insufficient oxygen availability)
- Pulmonary function test required: FEV1 >60% predicted minimum
- Portable oxygen: Consider supplemental oxygen throughout trek
Diabetes
Type 1 or Type 2 Diabetes:
- Trek is possible with careful management but requires planning
- Altitude and exertion affect blood glucose unpredictably
- Hypoglycemia risk increases (exertion + variable eating schedule)
Pre-trek preparation:
- Endocrinology consult 3+ months before
- Practice glucose management during long training hikes
- Hemoglobin A1c <8% (preferably <7%)
On-trek management:
- Test blood glucose 4-6x daily (before/after meals, before bed)
- Carry fast-acting glucose (gel packets, candy)
- Adjust insulin doses (typically need 25-30% reduction due to exertion)
- Guide knows signs of hypo/hyperglycemia
- Medical evacuation plan if uncontrollable glucose swings
Hypertension (High Blood Pressure)
Well-controlled hypertension (<140/90 on medication):
- Generally safe to trek
- Continue all medications
- Monitor blood pressure daily if possible
- Stay well-hydrated (dehydration raises BP)
Uncontrolled hypertension (>160/100):
- Optimize control before trekking (work with physician)
- Altitude may further increase BP
- Risk of stroke, cardiac events increases
Medication considerations:
- ACE inhibitors/ARBs: Safe at altitude
- Beta blockers: May limit maximal heart rate (adjust pacing expectations)
- Diuretics: Increase dehydration risk (monitor fluid intake carefully)
Pregnancy
Official recommendation: We do not accept pregnant trekkers due to liability and safety concerns.
Medical reality:
- First trimester: Miscarriage risk, morning sickness exacerbated by altitude
- Second trimester: Safest period if trekking approved by OB-GYN
- Third trimester: Fall risk, premature labor risk, no medical facilities on trail
If considering trekking while pregnant:
- OB-GYN clearance required
- Low-risk pregnancy only (no complications)
- Second trimester timing
- Understand evacuation limitations
- Consider alternative lower-altitude treks
Previous Altitude Illness
History of AMS (Acute Mountain Sickness):
- Common and doesn’t preclude future high-altitude trekking
- Emphasize acclimatization (3+ days in Cusco)
- Consider acetazolamide prophylaxis
- Monitor symptoms carefully
History of HACE or HAPE:
- Significant concern: recurrence risk is higher
- Requires physician clearance (ideally altitude medicine specialist)
- Extended acclimatization essential (4-5 days)
- Acetazolamide strongly recommended
- Lower threshold for evacuation decision
Essential Gear for Safety & Injury Prevention
Proper equipment directly affects injury rates. Here are evidence-based gear requirements.
The gear that matters most for injury prevention: mid or high-top boots broken in over 50+ km (low-cut shoes carry roughly 3x the sprain risk), trekking poles used correctly (they cut knee load on descents by 25-30%), a proper 3-layer clothing system for the swing between 20°C Cusco days and sub-zero pass nights, and a headlamp with 200+ lumens for the 4:00-4:30 AM Day 4 start. Full specifications, fit criteria, and what to avoid for every item are in our Inca Trail Packing List.
Personal First Aid Kit
Guides carry a full first aid kit, but your own kit gives you immediate access:
Recommended personal kit:
- Blister treatment: Moleskin, medical tape, blister gel pads
- Pain/altitude: Ibuprofen 600mg, acetazolamide (if prescribed)
- Gastrointestinal: Anti-diarrheal (loperamide), antacids
- Antibacterial: Antibiotic ointment, hand sanitizer
- Miscellaneous: Lip balm with SPF, sunscreen SPF 50+, bandages
Trail Hazards by Section: KM-by-KM Guide
Understanding specific hazards by location helps you prepare mentally and physically.
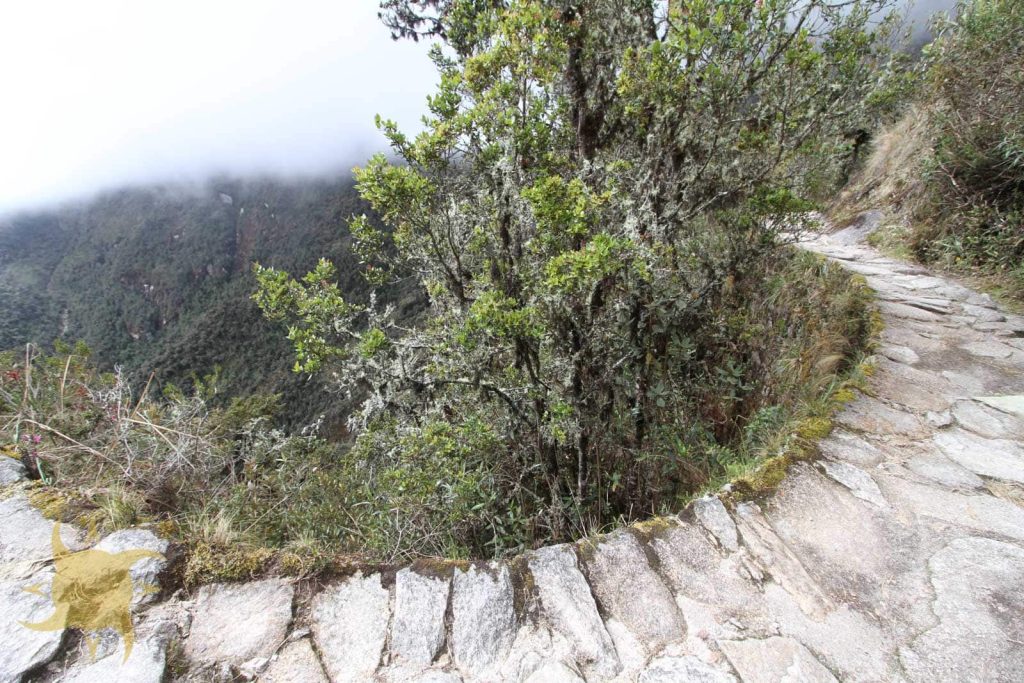
Day 1: KM 82 to Wayllabamba (11 km, 7 hours)
Elevation profile: 2,700m → 3,000m (300m gain) Terrain: Relatively gentle, wide trail Hazards: Low (acclimatization day)
Key sections:
- KM 82-85: Wide, easy walking (warm-up section)
- KM 85-88: First moderate ascent (test of fitness)
- KM 88-94: Rolling terrain, Llactapata ruins (photo distraction risk)
Safety notes:
- Most trekkers feel strong on Day 1 (avoid overconfidence)
- Pace conservatively (save energy for Days 2-3)
- Monitor hydration (beginning altitude exposure)
Day 2: Wayllabamba to Pacaymayo (11 km, 7 hours)
Elevation profile: 3,000m → 4,215m → 3,600m (1,215m gain, 615m loss) Terrain: Steep ascent, exposed pass, steep descent Hazards: HIGH (maximum altitude, steep terrain, highest injury rate)
Key sections:
KM 94-100 (Ascent to Llulluchapampa, 3,800m):
- Steady, relentless climb (600m gain)
- Trail narrower, rockier
- First real altitude exposure
- Hazards: Altitude symptoms appear, cardiovascular demand high
KM 100-106 (Ascent to Dead Woman’s Pass, 4,215m):
- Steepest section (400m gain in 3-4 km)
- Switchbacks, loose scree
- Thin air (40% less oxygen than sea level)
- Hazards: Altitude sickness peak risk, exhaustion, falls from dizziness
- Injury hotspot: 25% of altitude-related evacuations occur here
Pro Tip: Reach Dead Woman’s Pass by 11:00 AM if possible. Afternoon weather brings clouds, wind, and reduced visibility. Start early from Wayllabamba (6:30-7:00 AM).
KM 106-112 (Descent to Pacaymayo, 3,600m):
- Very steep Inca steps (600m descent)
- Narrow trail, drop-offs
- Knee-punishing gradient
- Hazards: Falls (15% of trail falls occur here), knee injuries, twisted ankles
- Technique: Shorten stride, use trekking poles, take breaks every 20 minutes
Day 3: Pacaymayo to Wiñay Wayna (16 km, 8 hours)
Elevation profile: 3,600m → 3,950m → 3,700m → 2,700m (complex up/down) Terrain: Second pass, cloud forest descent, archaeological sites Hazards: MODERATE-HIGH (longest day, cumulative fatigue)
Key sections:
KM 112-118 (Ascent to Runkurakay Pass, 3,950m):
- Moderate ascent (350m gain)
- Less difficult than Day 2 but fatigue is higher
- Hazards: Overconfidence (feels easier after Day 2), cumulative exhaustion
KM 118-130 (Undulating terrain through cloud forest):
- Multiple archaeological sites (Sayacmarca, Phuyupatamarca)
- Wet, mossy stones (slippery when humid)
- Narrower trail sections
- Hazards: Slips on wet stones, photo distraction near cliff edges
KM 130-142 (Descent to Wiñay Wayna, 2,700m):
- THE KNEE DESTROYER: 1,600+ Inca steps descending 1,000m
- Relentless, steep, uneven steps
- Arrives late in day (fatigue maximum)
- Hazards: Knee injuries (highest incidence), ankle sprains, exhaustion-related falls
- Critical technique: Trekking poles essential, rest every 30 minutes, side-step steepest sections
Expert Insight: Day 3’s descent to Wiñay Wayna causes more knee injuries than the rest of the trail combined. Trekkers underestimate it after “surviving” Dead Woman’s Pass. Pack extra ibuprofen, use trekking poles religiously, and don’t rush.
Day 4: Wiñay Wayna to Machu Picchu (4 km, 3 hours)
Elevation profile: 2,700m → 2,720m → 2,400m (minimal elevation change) Terrain: Final approach, Inti Punku (Sun Gate), descent to Machu Picchu Hazards: LOW (short, easy day)
Key sections:
KM 142-145 (Final forested section):
- Relatively flat, wide trail
- Excitement builds (last section before Machu Picchu)
- Hazards: Rushing (still uneven terrain), photo distraction
KM 145-147 (Inti Punku/Sun Gate approach and descent):
- Dramatic first view of Machu Picchu
- Narrow section with crowds (500 people converging)
- Steep stairs down to citadel
- Hazards: Crowding, jostling, collision with other groups, rushing
Safety notes:
- Early start (4:00-4:30 AM) means hiking in darkness (headlamp essential)
- Checkpoint at start creates bottleneck (patience required)
- Descent to Machu Picchu still requires caution (injuries occur from rushing)
On-Trail Safety Protocols & Daily Routines
What happens on well-run, safety-focused treks:
Morning Safety Routine
5:00-6:00 AM wake-up:
- Guide checks weather forecast (satellite communication)
- Trekker health assessment (anyone reporting symptoms?)
- Ankle taping for those with previous injuries
- Pack weight check (day pack maximum 8kg)
Pre-departure briefing:
- Today’s distance, elevation, estimated time
- Hazard warnings (wet sections, steep areas, narrow passages)
- Rest stop locations
- Weather changes expected
Hydration check:
- Urine color monitoring (pale yellow = adequate hydration)
- Water bottle refill (3-4 liters for the day)
Hiking Safety Protocols
Sweeper system:
- Lead guide at front (sets pace)
- Sweep guide at rear (no one left behind)
- Slowest hiker determines group speed
- Headcount at every reunion point
Buddy system:
- Pairs assigned Day 1
- Partners watch each other (hydration, fatigue, altitude symptoms)
- Never hike alone (even for bathroom breaks, where a partner waits in sight)
Rest break schedule:
- Mandatory every 45-60 minutes (regardless of individual fitness)
- 5-10 minute breaks (remove pack, sit, hydrate, snack)
- Longer lunch break (30-45 minutes, hot meal)
Communication protocol:
- Whistle carried by all (3 blasts = emergency)
- Guide carries satellite communicator (2-way messaging, SOS)
- VHF radio (guide-to-base camp)
Weather-Related Decision Making
When itineraries get modified:
- Lightning within 10km (shelter for 30+ minutes)
- Sustained rain >50mm/24 hours (landslide risk assessment)
- Wind >40 km/h at Dead Woman’s Pass (delay crossing until calmer)
- Hail (immediate shelter, wait for end)
Important: We cancel or modify 3-5% of departures annually for safety reasons (severe weather, trail conditions, group health issues). Your safety is more important than completing the trek on schedule.
Group Dynamics Management
Fast hiker protocol:
- Overconfident individuals rushing ahead = 40% of falls
- Mandatory group pace (lead guide sets speed)
- No passing guide without permission
- Photo stops must stay with sweep guide (not ahead)
Struggling hiker protocol:
- Sweep guide assesses (physical or mental struggle?)
- Encourage but don’t pressure
- Extra rest breaks if needed
- Porter assistance available (carry day pack if exhaustion severe)
- Evacuation discussion if continuing is unsafe
Trail Etiquette (Collision Prevention)
Right-of-way rules:
- Uphill hikers have right of way (physics + exhaustion)
- Descenders step aside at wide points
- Announce passing: “Left side” or “Right side” + wait for acknowledgment
Narrow section protocol:
- Single file
- Mountain-side (not cliff-side)
- No photography while moving
- Wait for wider sections for group photos
Llama/horse protocol:
- Animals have right of way (can’t stop easily)
- Step to uphill side (animals stay downhill)
- Stay calm, quiet (don’t spook animals)
Evening Safety Routine
Arrival at camp:
- Injury report (anyone needing first aid?)
- Altitude symptom check (Lake Louise AMS scoring)
- Gear drying (wet boots, socks, clothing)
Next-day briefing:
- Tomorrow’s challenge level
- Wake-up time, departure time
- Weather forecast
- Specific hazards to prepare for
First Aid Protocols for Common Situations
Guides carry full first aid kits and have Wilderness First Responder training, but understanding basic protocols helps you respond appropriately.
Blister Management
Prevention:
- Apply moleskin/tape to hotspots BEFORE blisters form
- Change socks at lunch break
- Keep feet dry
Small, intact blister (<1cm):
- Leave unbroken (body reabsorbs fluid naturally)
- Apply padded bandage (donut-shaped moleskin)
- Monitor for signs of tearing
Large, painful blister (>1cm):
- Sterilize needle (alcohol wipe or flame)
- Puncture at edge (not center)
- Drain fluid gently (leave skin intact)
- Apply antibiotic ointment
- Cover with sterile bandage
- Change dressing daily
Torn blister:
- Clean thoroughly with antiseptic
- Trim loose skin (sterilized scissors)
- Apply antibiotic ointment generously
- Cover with hydrocolloid bandage (guides carry)
- Watch for infection (redness, warmth, pus)
Ankle Sprain Treatment
Immediate response (RICE protocol):
Rest:
- Stop hiking immediately
- Remove boot carefully (before swelling increases)
- Remove weight from ankle
Ice:
- Cold water compress (soak bandana in stream)
- Apply 15-20 minutes
Compression:
- Elastic bandage or medical tape (guides carry)
- Wrap from toes toward heart
- Snug but not cutting circulation (can wiggle toes)
Elevation:
- Prop ankle above heart level when sitting/resting
Stabilization:
- Tape ankle for support (figure-8 pattern)
- Or lace-up ankle brace if carried
Evacuation decision:
- If able to bear weight and swelling is mild → continue with support
- If unable to bear weight or severe swelling → evacuation required
Altitude Sickness Management
See full altitude sickness section above for detailed protocols.
Quick reference:
- Mild AMS → Stop ascending, rest, hydrate, medicate (ibuprofen)
- Moderate AMS → Do not ascend, oxygen if available, consider descent
- HACE/HAPE → Immediate descent, emergency evacuation
Dehydration Recognition & Treatment
Symptoms by severity:
Mild dehydration:
- Thirst
- Dry mouth
- Dark yellow urine
- Fatigue
Moderate dehydration:
- Very dark urine or no urination for 6+ hours
- Dizziness when standing
- Rapid heartbeat
- Sunken eyes
Severe dehydration (medical emergency):
- Confusion, irritability
- Very rapid heartbeat
- Rapid breathing
- Lethargy, unconsciousness
Treatment:
Mild to moderate:
- Stop hiking, rest in shade
- Drink 500-750ml water slowly over 30 minutes
- Oral rehydration salts (guides carry)
- Salty snacks (restore electrolytes)
- Monitor urine color (should lighten)
Severe:
- Immediate rest, shade
- Aggressive fluid replacement
- May require IV fluids (evacuation)
Prevention:
- Drink before thirsty (consistent sipping all day)
- 3-4 liters daily minimum
- More in dry season or if heavy sweating
- Urine color monitoring (pale yellow goal)
Cuts & Abrasions
Trail environment challenges:
- No sterile water (all water potentially contaminated)
- Altitude slows healing (reduced oxygen to tissues)
- Infection risk higher (limited hygiene)
Treatment protocol:
Minor cuts/scrapes:
- Clean thoroughly with purified water
- Antiseptic wipe or solution
- Antibiotic ointment
- Cover with adhesive bandage
- Change dressing daily, monitor for infection
Deep cuts (>0.5cm deep, bleeding heavily):
- Direct pressure 10-15 minutes (sterile gauze)
- Elevate if possible
- Clean once bleeding controlled
- Butterfly closures or steri-strips (guides carry)
- Antibiotic ointment, protective bandage
- Watch for infection signs
Signs requiring evacuation:
- Bleeding uncontrolled after 15 minutes pressure
- Very deep cut (potentially needs stitches)
- Cut over joint (may require medical closure)
- Signs of infection (redness spreading, red streaks, pus, fever)
Emergency Evacuation Procedures
Understanding evacuation logistics helps set realistic expectations if emergency arises.
When Evacuation is Necessary
Medical emergencies requiring evacuation:
- Severe altitude sickness (HACE/HAPE symptoms)
- Cardiac symptoms (chest pain, irregular heartbeat)
- Fractures or dislocations
- Severe dehydration unresponsive to oral rehydration
- Uncontrolled bleeding
- Altered mental status (confusion, loss of consciousness)
- Hypothermia or severe exhaustion
Evacuation Methods & Timelines
Helicopter evacuation:
- When possible: Weather permitting (clear visibility, low wind)
- Response time: 30-90 minutes from Cusco (after SOS call)
- Cost: $4,000-$20,000+ USD in Peru specifically; broader remote-mountain medevac figures run $15,000-$50,000+ (travel insurance essential; get an exact quote from your provider)
- Landing zones: Limited locations (Dead Woman’s Pass, some flat camp areas)
- Weather limitations: Cannot fly in clouds, high winds, or darkness
Porter stretcher evacuation:
- When used: Helicopter impossible due to weather or patient can’t wait
- Personnel: 8 porters (rotating, very strenuous)
- Speed: 4-8 hours to nearest road access (depending on location)
- Most remote point: Dead Woman’s Pass (6-8 hours to road)
- Process: Patient strapped to rigid stretcher, carried by porters
Walking evacuation:
- When appropriate: Patient ambulatory but can’t continue trek
- Process: Guide escorts patient back along trail or forward to nearest exit
- Speed: Slower than normal hiking pace
Emergency Communication Systems
Primary: Garmin inReach satellite communicator
- 2-way text messaging
- SOS button (connects to emergency response)
- GPS tracking (shows exact location)
- Works anywhere (satellite coverage)
Secondary: VHF radio (guide-to-base camp)
- Limited range (line of sight, approximately 5-10 km)
- Base camp coordinates with Cusco emergency services
Tertiary: Cell phone
- Limited coverage (KM 82 start, KM 142 near Machu Picchu only)
- Unreliable in mountains
Evacuation Coordination Process
- Guide assesses situation (medical emergency?)
- Decision to evacuate (protocols followed)
- Activate emergency communication: – Satellite SOS pressed (sends coordinates) – 2-way message with patient status – Request helicopter or coordinate porter evacuation
- Cusco dispatch notified (our base)
- Helicopter coordinated (if weather permits) – Flight from Cusco to coordinates – Landing zone prepared (flat area, no obstacles) – Patient stabilized for transport
- Transport to Cusco hospital: – Hospital notified of incoming patient – Medical team ready on arrival
- Family notification (we contact your emergency contact)
Medical Facilities in Cusco
Best equipped for trekking emergencies:
Clinica Paredes:
- Address: Av. de la Cultura 710, Cusco
- Phone: +51 84 240387
- Services: 24-hour emergency, altitude illness specialists, hyperbaric chamber
Hospital Regional de Cusco:
- Address: Av. de la Cultura s/n, Cusco
- Phone: +51 84 227661
- Services: Public hospital, comprehensive emergency care
Note: Travel insurance with evacuation coverage is essential. Combined helicopter evacuation and hospital care can range from roughly $15,000 to well over $100,000 without insurance, depending on distance, weather, and treatment needed.
Guide Medical Qualifications & Equipment
Understanding exactly what medical capabilities exist on trail provides realistic expectations.
Required Guide Certifications
All our guides possess:
Wilderness First Responder (WFR):
- 80-hour certification course
- Skills: Patient assessment, wound management, splinting, hypothermia treatment, altitude illness recognition
- Recertification: Every 3 years
CPR & AED:
- Cardiopulmonary resuscitation certification
- Automated External Defibrillator training
- Annual recertification
Altitude illness training:
- Lake Louise AMS scoring system
- Recognition of HACE/HAPE
- Decision protocols for evacuation
Emergency oxygen administration:
- Portable oxygen use
- Flow rate management
- When to administer
Medical Equipment Carried
Lead guide medical kit contains:
Airway/Breathing:
- Pocket mask for rescue breathing
- Oral airways
- Portable oxygen (2 D-size canisters, 6-8 hours supply)
Altitude illness:
- Gamow bag (portable hyperbaric chamber, simulates 2,000m descent)
- Dexamethasone (HACE treatment)
- Acetazolamide (altitude sickness)
Medications:
- Pain relief: Ibuprofen, acetaminophen
- Anti-nausea: Ondansetron
- Antihistamines: Diphenhydramine
- Antibiotics: Azithromycin, ciprofloxacin (for severe infections)
- Anti-diarrheal: Loperamide
- Epinephrine auto-injector (severe allergic reactions)
Wound care:
- Sterile gauze pads, roller bandages
- Medical tape, adhesive bandages
- Antiseptic solution, antibiotic ointment
- Steri-strips, butterfly closures
Fracture management:
- SAM splints (moldable aluminum splints)
- Elastic bandages, triangular bandages
Diagnostic:
- Pulse oximeter (oxygen saturation, heart rate)
- Thermometer
- Stethoscope
- Blood pressure cuff (optional)
Emergency:
- Satellite communicator (Garmin inReach)
- Whistle, mirror (signaling)
- Emergency blanket
- Headlamp, extra batteries
Pro Tip: While guides are well-trained and equipped, they are not physicians. Wilderness First Responder certification teaches stabilization and evacuation decision-making, not advanced medical treatment. The goal is safe patient care until definitive medical help is reached.
Travel Insurance Requirements & Coverage
Travel insurance with proper coverage is non-negotiable for Inca Trail trekking.
Required Coverage Minimums
Medical evacuation:
- Minimum: $100,000 USD (current industry guidance for international/adventure travel; some older advice cites $50,000, but that is now considered a bare floor, not a safe minimum)
- Recommended: $250,000+ USD for remote, high-altitude trekking
- Why: Helicopter evacuation in Peru alone can run $4,000-$20,000+, and remote-mountain evacuations more broadly have been documented up to $50,000+; add hospital care and repatriation and costs climb well past $100,000 in a worst case
Emergency medical treatment:
- Minimum: $50,000 USD
- Recommended: $100,000+ USD (adventure-travel and hazardous-activity policies commonly set this as their baseline)
- Covers: Hospital care, physician fees, medications, surgery if needed
Trip cancellation/interruption:
- Amount: Cost of tour + flights (typically $2,000-5,000)
- Covers: Non-refundable costs if you must cancel pre-departure or abandon trek mid-way
Medical repatriation:
- Minimum: $50,000 USD
- Covers: Transport to home country if serious medical condition requires continued treatment
Critical Exclusions to Check
High-altitude trekking exclusions:
- Some policies cap altitude coverage at 3,000m or 4,000m
- Inca Trail reaches 4,215m, so verify your policy covers this elevation
- Explicitly confirm “trekking to 4,300m” is covered
Pre-existing conditions:
- Most policies exclude pre-existing medical conditions unless: – You purchase “pre-existing conditions waiver” (usually within 14-21 days of initial trip deposit) – Condition is stable and controlled
- Cardiac conditions, diabetes, respiratory disease particularly important to confirm coverage
Adventure activity exclusions:
- Verify “trekking” or “hiking” is explicitly covered
- Some policies exclude “mountaineering” (Inca Trail is not mountaineering, but confirm)
Recommended Insurance Providers
These providers consistently offer appropriate coverage for Inca Trail trekking:
World Nomads:
- Website: worldnomads.com
- Coverage: Up to 4,500m altitude
- Good reputation for adventure travel claims
- Available to many nationalities
Allianz Global Assistance:
- Website: allianztravelinsurance.com
- Comprehensive plans with high coverage limits
- 24/7 emergency assistance
IMG (International Medical Group):
- Website: imglobal.com
- Specialized travel medical insurance
- High evacuation coverage limits
Travel Guard:
- Website: travelguard.com
- Flexible plan options
- Good customer service reputation
Important: Purchase insurance within 14-21 days of your initial trek deposit to ensure pre-existing condition coverage and maximum benefits. Waiting until closer to departure often limits coverage.
What to Bring on Trek
Insurance documentation:
- Policy number and 24-hour emergency phone number
- Digital copy (email to yourself, accessible on phone)
- Physical copy (in day pack, waterproof bag)
- Leave copy with us (we can coordinate on your behalf if needed)
Emergency contact card:
- Your name, passport number
- Insurance provider, policy number, emergency phone
- Emergency contact person (family member with phone number)
- Known medical conditions, medications, allergies
Vaccinations & Health Documentation
Required vs. Recommended Vaccinations
No vaccinations are required for entry to Peru (unlike some countries requiring yellow fever proof). However, recommended vaccinations include:
Recommended vaccinations:
Hepatitis A:
- Transmission: Contaminated food/water
- Risk: Moderate in Peru (even in tourist areas)
- Vaccination: 2-dose series (0 and 6-12 months)
- Timing: First dose provides protection; complete series for long-term immunity
Typhoid:
- Transmission: Contaminated food/water
- Risk: Moderate in Peru
- Vaccination: Oral (4 capsules over 1 week) or injection (single dose)
- Timing: Complete 1-2 weeks before travel
Tdap (Tetanus, Diphtheria, Pertussis):
- Risk: Tetanus from cuts/scrapes on trail
- Vaccination: Booster every 10 years
- Check status: Ensure current before trekking
Routine vaccinations:
- MMR (Measles, Mumps, Rubella)
- Varicella (Chickenpox)
- Polio
- Annual influenza
Yellow fever:
- Not required for Cusco/Inca Trail (above altitude where mosquitoes that carry yellow fever exist)
- Required if continuing to Amazon rainforest (below 2,300m)
- Vaccination: Single dose, lifelong immunity
- Side effects: More common in ages 60+ (discuss with physician)
Malaria Prophylaxis
Cusco and Inca Trail: No malaria risk (altitude too high for mosquitoes that transmit malaria)
If combining with Amazon travel:
- Consult travel medicine physician
- Options: Atovaquone-proguanil (Malarone), doxycycline, or mefloquine
- Begin before entering malaria zone, continue after leaving
Pre-Travel Medical Consultation
Recommended timing: 4-6 weeks before departure
Travel medicine clinic or primary care physician can:
- Review vaccination history, administer needed vaccines
- Prescribe altitude sickness prophylaxis (acetazolamide) if appropriate
- Provide antibiotics for traveler’s diarrhea (azithromycin or ciprofloxacin)
- Assess pre-existing conditions, provide medical clearance if needed
- Discuss any medication adjustments needed for altitude
What to bring to appointment:
- Vaccination records
- List of current medications
- Medical history (especially cardiac, respiratory, diabetes)
- Itinerary (altitude profile, trek duration)
Conclusion: Trek Smart, Trek Safe
The Inca Trail to Machu Picchu is a trek thousands complete safely every year. Genuine risks exist (altitude reaching 4,215 meters, steep terrain, a remote location), but the overwhelming majority of incidents are preventable through proper preparation, appropriate gear, and respecting the environment’s demands.
Your safety checklist:
Physical preparation: Complete 12-week training program focusing on cardio endurance, leg strength, and descending technique
Acclimatization: Spend minimum 2-3 days in Cusco before starting trek (3-4 days if 50+ years old)
Medical screening: Ages 50+ or with cardiac/respiratory/chronic conditions should obtain physician clearance
Proper gear: Broken-in hiking boots (50+ km), trekking poles, layered clothing system, headlamp
Travel insurance: Minimum $100,000 evacuation coverage (more for remote/high-altitude treks), verify altitude limit, purchase within 14-21 days of deposit
Vaccinations: Hepatitis A, typhoid, ensure Tdap current; consult travel medicine physician 4-6 weeks before departure
Mental preparation: Understand realistic challenges, practice stress management, prepare for discomfort
Next Steps:
- Book medical consultation: Schedule appointment 4-6 weeks before departure for vaccinations, medical clearance, prescriptions
- Start training program: Begin 12-week fitness plan today (don’t wait until “next month”)
- Research insurance providers: Compare World Nomads, Allianz, IMG for appropriate coverage
- Download safety checklists: Get our Inca Trail Safety Preparation Guide and Emergency Contact Information Card
- Connect with our team: Questions about fitness requirements or medical concerns? Contact our trekking specialists
Related Articles
- Altitude Sickness in Peru: A Destination-by-Destination Guide
- Inca Trail Training Plan: 12 Weeks to Dead Woman’s Pass
- Inca Trail Packing List 2026: 27 Essentials Under 7kg
- Inca Trail: The Complete Guide
- Inca Trail 4 Days: Classic Trek to Machu Picchu
Medical Disclaimer: This guide provides educational information based on wilderness medicine best practices and our operating experience since 2006. It does not constitute medical advice. Always consult qualified healthcare providers for personalized medical guidance, particularly regarding pre-existing conditions, medications, and fitness for high-altitude trekking.
Last Updated: August 4, 2026 | Medical Review: Content reviewed by wilderness medicine specialists | Operational Data: Our trek records since 2006