
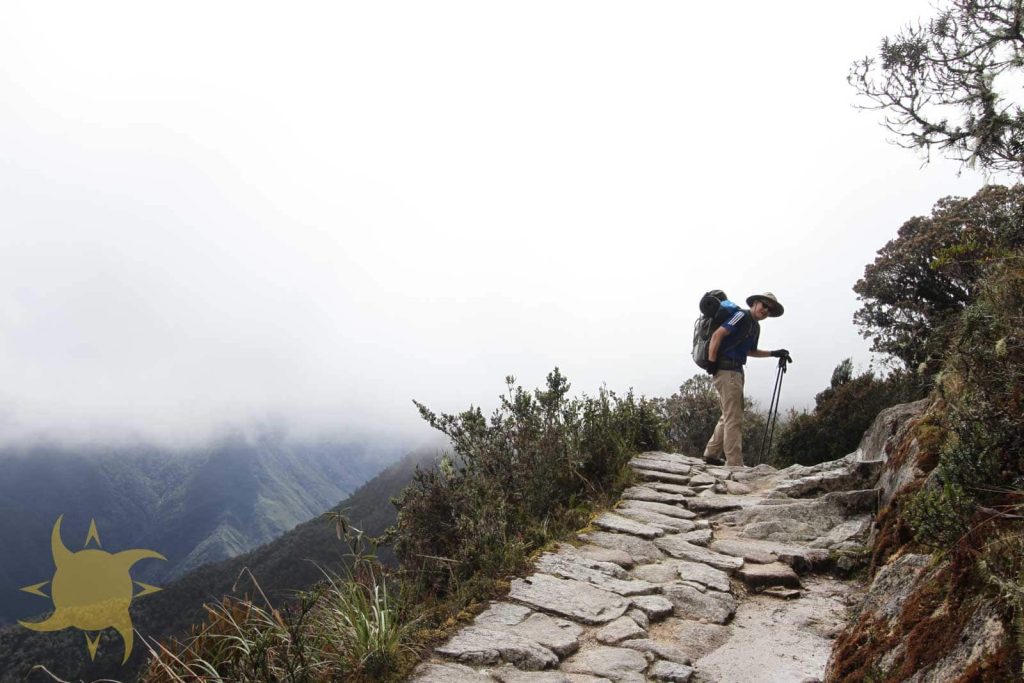
Packing for the Inca Trail is an exercise in weight management, where every item must earn its place. With strict porter duffel limits of 7kg (15.4 lbs), unpredictable Andean weather ranging from scorching sun to freezing nights, and four days of rugged terrain across three climate zones, choosing the right gear can make or break your trek to Machu Picchu.
Most trekkers make critical packing mistakes: overpacking “just in case” items that weigh down porters, underpacking essential layers that leave them shivering at 4,215-meter Dead Woman’s Pass, or bringing brand-new boots that destroy their feet. The result is unnecessary suffering, environmental impact from disposable items, and a harder trek than it needs to be.
This packing list covers the gear needed for each climate zone, weight optimization strategies to stay under the porter limit, what to rent versus buy in Cusco, and category-by-category breakdowns for clothing layers, footwear, sleeping systems, and electronics. For the full trek overview, see our Inca Trail guide.
Quick Answer: The essential Inca Trail packing list includes broken-in hiking boots, moisture-wicking base layers, insulated mid-layer, waterproof rain jacket, sleeping bag rated to -10°C, 25-30L daypack, trekking poles, headlamp, water bottles, sun protection, and toiletries. Total weight for porter duffel must not exceed 7kg (15.4 lbs) with most operators (Alpaca Expeditions, AB Expeditions, SAM Travel Peru), though some run stricter 5-6kg limits, so confirm your operator’s figure. Personal daypack carries 3-5kg on top of that. Most gear can be rented in Cusco; see current rental pricing in our Inca Trail Camping Guide.
Packing Philosophy: The 7kg Strategy
Peru’s porter law, Ley 31614 (2022), limits porter loads to 20 kg for men and 15 kg for women, which is why operators cap your duffel.
Weight Limits Explained
Porter Duffel Bag: 7kg maximum (15.4 lbs) This is the bag your porter carries between campsites. It contains sleeping gear, extra clothing, and items you don’t need during the day. We weigh duffels at the trailhead, and exceeding the limit means repacking on the spot.
Your Daypack: 3-5kg recommended (6.6-11 lbs) You carry this throughout each hiking day. It holds water, snacks, rain gear, camera, extra layers, and personal items. Keep it light, since you’ll be hiking 6-8 hours daily at altitude.
Machu Picchu bag limit: 40 × 35 × 20 cm (16 × 14 × 8 in) The citadel limits bag size, not weight. A bigger pack has to go into the luggage storage outside the entrance.
Pro Tip: The 7kg duffel limit includes the weight of your duffel bag itself (typically 0.5-1kg). Pack light by using a compression stuff sack instead of a heavy duffel.
Weight Optimization Strategy
The Three-Pile Method:
- Essential (Must Have): Items you need for safety, weather protection, and basic comfort
- Important (Should Have): Items that significantly improve comfort but have workarounds
- Optional (Nice to Have): Luxury items only if weight allows
Start by packing essentials, add important items, then evaluate remaining weight capacity for optionals.
Smart Weight-Saving Tactics:
- Wear your heaviest items (boots, jacket) during travel days
- Share toiletries with trekking partners (one sunscreen, one toothpaste)
- Pack travel-size products or decant into small containers
- Choose quick-dry clothing to minimize extra sets
- Rent heavy items (sleeping bag, trekking poles) instead of bringing them
By the Numbers:
- Average trekker weight distribution: 4-5kg duffel, 3-4kg daypack
- Overweight violations: 30% of trekkers exceed limit on first weigh-in
- Weight impact on porters: Each extra kilogram increases injury risk by 12%
- Optimal packing: Most experienced trekkers stay at 5-6kg duffel
Porter Welfare Considerations
The weight limit exists to protect porters who make multiple trips daily, often carrying loads for 6-8 hours across brutal terrain. These regulations came after decades of exploitation where porters carried 30-40kg loads.
Ethical Packing Principles:
- Never exceed the 7kg limit (fines go to us, not porters)
- Pack efficiently to reduce porter burden
- Avoid single-use plastics that porters must carry out
- Porter welfare is protected under IPPG (International Porter Protection Group) standards
Important: Pressuring porters to carry overweight bags is illegal and unethical. We strictly enforce the weight limit, and we will never suggest “tipping extra to exceed limits.”
Essential Documents & Money
Before packing a single piece of gear, ensure you have the critical documents that allow you to trek.
Required Documents
Original Passport (Required) Your passport must match your permit exactly: same spelling, same passport number. Bring the physical passport, not a copy. It’s checked at every checkpoint (KM 82, Wayllabamba, Dead Woman’s Pass, Wiñay Wayna) and required for Machu Picchu entry.
- Valid for 6+ months beyond trek date
- Same passport used for permit booking
- Protected in waterproof bag or case
- Color photocopy kept separately (backup)
Student ID (If Applicable) Students under 25 with a valid ISIC (International Student Identity Card) receive discounted Machu Picchu entry: approximately $20 (77 soles) versus the standard foreign adult rate of approximately $40 (152 soles), per official Peru Ministry of Culture pricing. Bring international student ID (ISIC card) and university ID.
Travel Insurance Documentation Print or download policy details, emergency contact numbers, and claim procedures. Keep digitally accessible on phone.
Permit Confirmation We provide this 2-3 weeks before departure. Print a copy even though we carry the official document.
Money on the Trail
Peruvian Soles (PEN) – Cash Required:
- 250-400 soles recommended
- Crew tips: about S/140-280 (US$40-80 per trekker)
- Snacks at checkpoints: 20-30 soles
- Emergency expenses: 50 soles buffer
US Dollars:
- Backup currency: $50-100
- Many vendors accept USD but give poor exchange rates
Important: There are ZERO ATMs on the Inca Trail. Withdraw cash in Cusco before departure. The last ATM is in Ollantaytambo (starting point), but it’s often empty.
Where to Store Documents
Daypack (On Your Person):
- Passport in waterproof case
- Cash in hidden money belt or chest pocket
- Insurance card
Duffel Bag (Porter Carried):
- Passport photocopy (backup)
- Additional emergency cash ($50)
- Insurance policy printout
Pro Tip: Take photos of your passport, insurance card, and credit cards. Store in cloud storage (Google Drive, Dropbox) accessible offline. If documents are lost or damaged, you’ll have digital copies.
Clothing: The Layering System
The Inca Trail crosses three distinct climate zones (cloud forest at 2,700m, alpine tundra at 4,215m, and subtropical at Machu Picchu), requiring a versatile layering system that adapts to dramatic temperature swings.
Understanding Layering Principles
Base Layer (Next to Skin): Moisture-wicking, regulates body temperature Mid Layer (Insulation): Traps warm air, provides warmth during breaks Outer Layer (Weather Protection): Blocks wind, rain, and snow
The system works by allowing you to add or remove layers as conditions change throughout each hiking day.
Base Layers (3-4 Sets)
Long-Sleeve Merino Wool or Synthetic Shirts:
- 3 shirts minimum (wear one, pack two in duffel, one in daypack)
- Merino wool ideal: odor-resistant, temperature-regulating, quick-drying
- Synthetic alternative: polyester or nylon blends (more affordable)
- Avoid cotton: absorbs sweat, stays wet, causes hypothermia
Hiking Pants/Leggings:
- 2 pairs (one wearing, one in duffel)
- Convertible zip-off pants: shorts during hot climbs, long for cold
- Leggings for women: comfortable, lightweight, layering-friendly
- Quick-dry fabric essential
Underwear:
- 4 pairs (one wearing, two in duffel, one spare in daypack)
- Moisture-wicking synthetic or merino wool
- Quick-dry for hand washing
Sports Bras (Women):
- 2-3 high-impact sports bras
- Moisture-wicking, supportive
- Consider one in daypack for clothing changes
Base Layer Bottoms (Optional but Recommended):
- 1 pair thermal leggings for sleeping
- Worn under hiking pants on cold mornings
- Doubles as pajamas
Expert Insight: Merino wool base layers cost 2-3x more than synthetics but are worth the investment. They naturally resist odor, meaning you can wear the same shirt multiple days without smelling like a locker room, which matters when water for washing is limited.
Mid Layers (2-3 Pieces)
Insulated Jacket (Down or Synthetic):
- 1 puffy jacket (lightweight down or synthetic insulation)
- Down: warmer, more compressible, but useless when wet
- Synthetic: maintains warmth when damp, dries faster, heavier
- Minimum 200g insulation (for -10°C temperatures at night)
Fleece Jacket or Hoodie:
- 1 midweight fleece (200-weight or heavier)
- Active insulation: breathable during hiking, warm during breaks
- Quarter-zip or full-zip for temperature regulation
- Fleece breathes better than puffy jackets during movement
Thermal Long Underwear (Optional):
- 1 set for extra warmth at high camps
- Worn under hiking pants on Day 2 ascent to Dead Woman’s Pass
Pro Tip: Pack your puffy jacket in a waterproof stuff sack at the bottom of your daypack. The moment you stop for lunch or reach camp, put it on immediately. Body temperature drops rapidly at altitude, and hypothermia risk increases during rest periods.
Outer Layers (Weather Protection)
Waterproof Rain Jacket:
- 1 quality rain jacket (20,000mm+ waterproof rating)
- Breathable membrane (Gore-Tex, eVent, or similar)
- Hood with adjustable drawcords
- Pit zips for ventilation
- Packable into daypack
Rain Pants (Highly Recommended):
- 1 pair waterproof pants
- Essential even in dry season (afternoon rain common)
- Full-length side zips allow wearing over boots
- Lightweight, packable
Poncho (Alternative):
- Covers both you and your daypack
- Less breathable than jacket, but excellent pack protection
- Popular with budget travelers
- Ineffective in wind
Important: Even during “dry season” (May-September), afternoon rain occurs 30-40% of days. Rain gear is mandatory, not optional. The worst-case scenario is being soaked at 4,000 meters with no dry layers, which is a recipe for hypothermia.
Head, Hands & Neck
Sun Hat:
- 1 wide-brimmed hat or baseball cap
- Sun protection during exposed uphill climbs
- Breathable, quick-dry material
Warm Beanie:
- 1 fleece or wool beanie
- Essential for freezing nighttime temperatures
- Worn at camp and early morning starts
Neck Gaiter or Buff:
- 1-2 multifunctional tubular scarves
- Dust protection, sun protection, warmth, sweat management
- Versatile and lightweight
Gloves:
- 1 pair warm gloves (fleece or lightweight insulated)
- Needed for early morning hiking (starts at 5:30 AM Day 4)
- Touchscreen-compatible fingers useful for photos
Footwear
Hiking Socks:
- 3-4 pairs merino wool or synthetic hiking socks
- Midweight or heavyweight cushioning
- One pair in daypack (for wet sock changes)
- Avoid cotton: causes blisters
Camp Shoes:
- 1 pair lightweight sandals or camp shoes
- Worn at campsites to air out feet
- Tevas, Crocs, or slide sandals
- Doubles as bathroom/water crossing shoes
Additional Clothing Items
Shorts (Optional):
- 1 pair for hot valley sections
- Worn on Day 1 and early Day 4
T-Shirts (Optional):
- 1-2 short-sleeve shirts for hot sections
- Synthetic or merino wool (never cotton)
Swimsuit (Optional):
- Women may want for washing/privacy
Pajamas:
- Base layers double as sleepwear
- No dedicated pajamas needed
Clothing Weight Breakdown:
- Base layers: 0.8-1.2kg
- Mid layers: 0.8-1.0kg
- Outer layers: 0.6-0.8kg
- Accessories: 0.3-0.5kg
- Total: 2.5-3.5kg
Seasonal Variations
Dry Season (May-September) Adjustments:
- Lighter sleeping bag possible (-4°C rating)
- Less emphasis on rain gear (but still bring it)
- More sun protection needed
Rainy Season (October-April) Adjustments:
- Warmer sleeping bag essential (-10°C rating)
- Pack rain gear in top of daypack (daily use)
- Quick-dry fabrics critical
- Extra plastic bags for wet items
Footwear: Boots vs Trail Runners
Your footwear choice is the single most important gear decision for the Inca Trail. Get it wrong, and you’ll spend four days in agony with blisters, twisted ankles, or destroyed knees.
Hiking Boots (Traditional Choice)
When to Choose Boots:
- First-time trekkers
- History of ankle instability
- Prefer feeling of ankle support
- Trekking in rainy season (better waterproofing)
Boot Requirements:
- Mid-height (above ankle) for support
- Waterproof membrane (Gore-Tex or equivalent)
- Vibram or similar grippy sole
- Broken in for 50-100 kilometers before trek
- Snug fit without pressure points
Recommended Boot Types:
- Leather full-grain boots: most durable, heavy (not recommended)
- Synthetic boots: lighter, faster break-in, good performance
- Lightweight hiking boots: best balance of support and weight
Important: NEVER hike the Inca Trail in brand-new boots. The combination of steep descents, uneven Inca steps, and multi-day use will create devastating blisters. Break in boots on local trails, including downhill sections, before your trek.
Trail Running Shoes (Modern Alternative)
When to Choose Trail Runners:
- Experienced hikers with strong ankles
- Ultralight backpacking philosophy
- Dry season trekking
- Comfort prioritized over ankle support
Trail Runner Requirements:
- Aggressive tread pattern for grip
- Rock plate for stone protection
- Quick-drying (most aren’t waterproof)
- One half-size larger than street shoes (toe room for descents)
Advantages:
- Lighter weight (300-400g vs 700-900g per boot)
- More comfortable for long days
- Dry faster if soaked
- Less break-in required
Disadvantages:
- No ankle support on uneven terrain
- Feet get wet easily
- Less protection from rocks
- Shorter lifespan
Expert Insight: About 20-30% of experienced trekkers now wear trail runners on the Inca Trail. The key is honest self-assessment. If you’ve never hiked in trail runners, don’t experiment on this trek. Stick with supportive boots.
Socks Strategy
Hiking Sock Essentials:
- Merino wool (natural, odor-resistant) or synthetic blend
- Midweight to heavyweight cushioning
- Seamless toe construction (prevents blisters)
- Height above boot collar
Sock System:
- Start each day with fresh, dry socks
- Carry spare pair in daypack
- Rotate damp socks to outside of pack to air dry
- Hand wash socks at camp when possible
Blister Prevention:
- Wear sock liners under hiking socks (reduces friction)
- Apply blister prevention tape (Leukotape P) to hot spots before trekking
- Bring Compeed blister patches for emergency treatment
Breaking In Boots
The 50-100km Rule:
Weeks 6-8 Before Trek:
- Wear boots around house (2-3 hours daily)
- Short walks on pavement (1-2km)
Weeks 4-5 Before Trek:
- Day hikes on trails (5-10km)
- Include elevation gain/loss
- Wear hiking socks you’ll use on trek
Weeks 2-3 Before Trek:
- Longer hikes with daypack loaded (15-20km)
- Focus on downhill sections (test toe box space)
- Identify any pressure points
Week 1 Before Trek:
- Rest feet, don’t wear boots
- Pack boots in carry-on luggage (never check them)
Pro Tip: If boots cause any pain after 50km of breaking in, don’t ignore it hoping it will “get better.” The Inca Trail will multiply any discomfort by 10. Consider different boots or professional boot fitting.
What to Avoid
- Fashion hiking boots: Look great, perform poorly
- Waterproof boots without breathability: Feet swim in sweat
- Oversized boots: Blisters from foot sliding on descents
- Undersized boots: Black toenails from compressed toes
- Heavy mountaineering boots: Overkill for Inca Trail terrain
Sleeping System: Bag, Pad & Warmth
Nighttime temperatures at Inca Trail camps range from 0°C to -10°C (32°F to 14°F) depending on season and camp location. A proper sleeping system is essential for restful sleep and recovery.
Sleeping Bag Temperature Ratings
Understanding Ratings:
- Comfort Rating: Temperature at which average sleeper stays comfortable
- Lower Limit: Temperature at which average male stays comfortable (women: add 5-10°C)
- Extreme: Survival temperature (risk of hypothermia)
Recommended Ratings by Season:
Dry Season (May-September):
- Comfort rating: -5°C to -10°C (23°F to 14°F)
- Reason: Clear skies cause radiative cooling
Shoulder Season (April, October):
- Comfort rating: -10°C (14°F)
- Reason: Unpredictable weather, colder nights possible
Rainy Season (November-March):
- Comfort rating: -4°C to -7°C (25°F to 19°F)
- Reason: Cloud cover retains some warmth
Pro Tip: Always choose a sleeping bag rated 5-10°C colder than expected temperatures. Better to unzip and vent heat than shiver all night unable to warm up.
Down vs Synthetic Sleeping Bags
Down Fill (Duck or Goose):
Advantages:
- Superior warmth-to-weight ratio
- More compressible (smaller pack size)
- Longer lifespan (15-20 years)
- Luxuriously cozy feeling
Disadvantages:
- Useless when wet (loses all insulation)
- Slower drying time
- More expensive ($200-400 for quality bags)
- Requires careful storage
Synthetic Fill (Polyester):
Advantages:
- Maintains warmth when damp
- Dries faster
- More affordable ($80-200)
- Less maintenance required
Disadvantages:
- Heavier (1.5-2x down weight)
- Less compressible (larger pack size)
- Shorter lifespan (5-10 years)
- Less cozy feeling
Verdict for Inca Trail: Both work well. Down is ideal for dry season and experienced campers who protect gear. Synthetic is better for rainy season and budget travelers.
Sleeping Pad Options
Inflatable Sleeping Pads:
- Excellent insulation (R-value 3-5)
- Comfortable cushioning
- Compact when deflated
- Risk of puncture
- Rental option available in Cusco; see the Inca Trail Camping Guide for current pad rental pricing
Foam Sleeping Pads:
- Indestructible (no puncture risk)
- Budget-friendly
- Bulky to carry
- Less comfortable
- Many treks include these
Provided: We include basic foam pads. Upgrading to inflatable pad (rental or bring your own) significantly improves sleep quality.
Important: Sleeping pad insulation (R-value) is as important as sleeping bag warmth. Cold ground sucks heat from your body. Even with a warm sleeping bag, inadequate pad = cold, sleepless night.
Sleeping Bag Liners
Silk or Microfiber Liners:
- Adds 5-10°C warmth
- Keeps sleeping bag clean
- Minimal weight/space (200-300g)
- Acts as sleeping sheet in warm conditions
When to Bring:
- If sleeping bag barely meets temperature requirements
- Cold sleepers (women, smaller body mass)
- Hygiene-conscious travelers
Pillow Options
Inflatable Camping Pillow:
- Compact, comfortable
- Weight: 100-200g
- Rental sometimes available
Stuff Sack Pillow:
- Fill stuff sack with extra clothes (jacket, fleece)
- Free, zero-weight solution
- Lumpy but functional
No Pillow:
- Use folded jacket or daypack
- Minimalist approach
Cusco Rental vs Buying
Rental Pros:
- Cost-effective; see the Inca Trail Camping Guide for current sleeping bag and pad rental pricing
- No need to transport bulky gear
- Try different options
- Supports local economy
Rental Cons:
- Variable quality (inspect carefully)
- Sanitation concerns (use liner)
- Limited selection during peak season
- Must rent in Cusco 1-2 days before trek
When to Buy:
- Planning multiple treks in Peru
- Very tall/short (hard to find correct sizes)
- Specific warmth needs
- Hygiene priority
By the Numbers:
- Sleeping bag weight: 1.0-1.8kg (down), 1.5-2.5kg (synthetic)
- Sleeping pad weight: 0.4-0.6kg (inflatable), 0.3-0.5kg (foam)
- Pillow weight: 0.1-0.2kg
- Sleeping system total: 1.8-3.5kg
Sleeping Bag Care on Trek
Daily Routine:
- Air out sleeping bag each morning (drape over tent)
- Store in waterproof stuff sack in duffel
- Never leave compressed in stuff sack for extended periods
- Keep away from tent walls (condensation)
If Sleeping Bag Gets Wet:
- Notify guide immediately
- Attempt to dry at lunch break or in sun
- We keep emergency backup sleeping bags on hand
- In worst case, layer all your clothes and huddle with tent mate
Daypack Essentials: What to Carry Daily
Your daypack is your mobile command center during 6-8 hours of daily hiking. Pack strategically: too heavy and you’ll be miserable, too light and you’ll lack essentials.
Daypack Size & Features
Capacity: 25-35 Liters
- 25L: minimalist packers, dry season
- 30L: sweet spot for most trekkers
- 35L: rainy season or photographers with gear
Essential Features:
- Adjustable hip belt (transfers weight to hips)
- Sternum strap (stabilizes load)
- Padded shoulder straps
- Hydration bladder compatible
- Rain cover or waterproof material
- External attachment points (trekking poles)
- Breathable back panel
Top Daypack Choices:
- Osprey Talon/Tempest 30L
- Gregory Zulu/Jade 30L
- Deuter Speed Lite 30L
- REI Flash 30L
Daily Carry Checklist
Hydration:
- 2-3 liters water capacity
- Hydration bladder (2-3L) OR
- 2-3 reusable water bottles (1L Nalgene)
- Water purification tablets (backup)
Food:
- Daily snacks (trail mix, energy bars, chocolate)
- Lunch (provided by us, packed each morning)
- Emergency snacks (extra energy bars)
Layers:
- Rain jacket (accessible top pocket)
- Mid-layer fleece or puffy
- Extra base layer (for cold starts)
- Gloves and beanie
Sun Protection:
- Sunscreen SPF 50+ (reef-safe)
- Lip balm with SPF
- Sunglasses (UV400 protection)
- Sun hat
Personal Items:
- Passport in waterproof case
- Cash (soles for snacks/tips)
- Phone (airplane mode to save battery)
- Camera and extra batteries
- Headlamp (for pre-dawn Day 4 start)
Toiletries:
- Small roll toilet paper in ziplock
- Hand sanitizer
- Personal medications
- Blister treatment kit
Other Essentials:
- Trekking poles (if using)
- Packable daypack rain cover
- Ziplock bags (wet items, trash)
- Bandana or buff
Pro Tip: Pack your daypack in order of likely use. Rain jacket goes in top external pocket for instant access. Lunch and mid-layer in main compartment. Rarely-used items (headlamp during day) at bottom.
Weight Distribution Strategy
Bottom (Closest to Back):
- Heaviest items: water, camera gear
- Keeps center of gravity close to body
Middle (Main Compartment):
- Medium-weight items: layers, food, first aid
Top (Accessible):
- Light, frequently-accessed: sunscreen, snacks, map
External Pockets:
- Water bottles (side pockets)
- Rain jacket (top pocket)
- Trekking poles (when not in use)
What NOT to Bring in Daypack
- Books (too heavy; download ebooks to phone)
- Full-size toiletries (use travel sizes)
- Extra shoes (wear one, pack one in duffel)
- Laptop or tablet (leave at hotel)
- Hair dryer, styling tools (no electricity at camps)
- Excessive clothing changes (one extra base layer maximum)
Expert Insight: Trekkers with 35L+ packs are usually carrying unnecessary weight. Challenge yourself to pack a 25-30L daypack. You’ll be faster, more comfortable, and enjoy the trek more. Remember that porters carry your main gear. Your daypack should only contain absolute daily essentials.
Rain Gear & Weather Protection
Even during peak dry season (June-August), afternoon rain occurs on 20-30% of days. Be prepared for everything from scorching sun to sleet at high altitude.
Rain Jacket Selection
Waterproof Rating:
- Minimum: 10,000mm waterproof rating
- Recommended: 20,000mm+ (Gore-Tex standard)
- Breathability: 10,000g/m²/24hr minimum
Key Features:
- Adjustable hood (helmet-compatible)
- Pit zips for ventilation
- Two-way front zipper
- Packable into own pocket
- Adjustable cuffs and hem
What to Avoid:
- “Water-resistant” jackets (inadequate for downpours)
- Non-breathable PVC ponchos (sweat accumulation)
- Fashion rain jackets without technical specs
Rain Pants Strategy
Full Zip vs Elastic:
- Full-length side zips: easier to put on over boots
- Elastic ankle: cheaper, less durable
When to Wear:
- Any rain more than light drizzle
- High altitude where rain = hypothermia risk
- Afternoon storms (watch for darkening clouds)
Pro Tip: Most trekkers underuse rain pants. Don’t wait until you’re soaked to put them on. At the first sign of rain, stop and don rain pants immediately. Wet hiking pants sap body heat and take hours to dry.
Poncho Alternative
Advantages:
- Covers both you and daypack
- Excellent ventilation (no sweat buildup)
- Budget-friendly ($10-20)
Disadvantages:
- Useless in wind (flaps around)
- No hand freedom (holds poncho closed)
- Difficult to wear with trekking poles
- Awkward on steep terrain
Verdict: Poncho is acceptable for light rain in sheltered areas, but dedicated rain jacket + pants is superior for serious weather and steep terrain.
Pack Rain Protection
Rain Cover (Preferred):
- Built-in pack rain cover OR
- Separate pack cover (matches pack size)
- Elastic cord keeps cover secure in wind
Dry Bags/Stuff Sacks:
- Waterproof stuff sacks for sleeping bag, electronics, clothes
- Double protection: rain cover + internal dry bags
- Small dry bag for electronics/passport
Emergency Backup:
- Large trash compactor bag (2-3 mil thickness)
- Fits inside pack as waterproof liner
- Costs $1, weighs nothing
Important: Don’t rely solely on pack rain cover. Wind-driven rain finds openings. Use internal waterproof stuff sacks for critical items like sleeping bag, down jacket, and electronics. A soaked sleeping bag or dead phone can ruin your trek.
Lightning Safety
Inca Trail Lightning Risks:
- High exposure above tree line (Days 2-3)
- Afternoon storms (1-4 PM) during rainy season
- Metal objects (trekking poles) attract lightning
Safety Protocol:
- Monitor weather (dark clouds, distant thunder)
- Avoid exposed ridges during storms
- Put down trekking poles if lightning nearby
- Crouch low, feet together, minimize ground contact
- Wait 30 minutes after last thunder before resuming
Accessories & Electronics
Here’s the technology worth bringing, and how to keep it charged.
Lighting
Headlamp (Essential):
- Minimum 200 lumens brightness
- Red light mode (preserves night vision at camp)
- Battery life: 40+ hours on low setting
- Fresh batteries or fully charged
Why Headlamp > Flashlight:
- Hands-free operation
- Multiple brightness settings
- Essential for 3:30 AM wake-up Day 4
Battery Strategy:
- Bring 1-2 extra sets of batteries
- Cold kills battery life (keep headlamp in sleeping bag)
- Lithium batteries perform better in cold than alkaline
Electronics
Phone/Camera:
- Primary camera for most travelers
- Airplane mode conserves battery
- Backup charger: 10,000-20,000mAh power bank
- Waterproof case or ziplock bag
DSLR/Mirrorless Camera (Optional):
- Weight consideration: 0.5-1.5kg
- 1-2 lenses maximum (wide angle + standard zoom)
- Extra batteries (cold drains fast)
- Silica gel packets in camera bag (moisture protection)
Action Camera (GoPro, etc.):
- Good for POV hiking footage
- Chest mount for hands-free recording
- Waterproof without case
Smartwatch (Optional):
- Altitude tracking
- Heart rate monitoring
- GPS tracking
- Battery drains quickly at altitude
Pro Tip: Take photos during rest breaks, not while hiking. Stopping on narrow trails to photograph creates bottlenecks for other trekkers and increases stumble risk on uneven terrain.
Power Management
No Electricity at Camps:
- Most camps have zero charging options
- Some luxury tours provide solar charging (limited capacity)
- Plan for 4 days with no power
Power Bank Strategy:
- 20,000mAh charges iPhone 4-5 times
- Charge in Ollantaytambo night before trek
- Keep warm (battery efficiency drops 20-30% in cold)
Reducing Power Consumption:
- Airplane mode always (except emergencies)
- Low screen brightness
- Turn off background app refresh
- Download offline maps/content before trek
Trekking Poles
Benefits:
- Reduce knee stress by 25% on descents
- Improve balance on uneven terrain
- Aid uphill by engaging upper body
- Can be used as tent pole support
When Essential:
- Pre-existing knee issues
- Day 3 descent (1,600 stone steps to Wiñay Wayna)
- Rainy season (muddy, slippery trails)
- Heavier backpacks
Rental vs Bring:
- Rental available in Cusco; see current pole rental pricing in the Inca Trail Camping Guide
- Good quality available in Cusco
- Saves luggage space
Types:
- Telescoping (adjustable length)
- Z-fold/collapsible (ultra-packable)
- Fixed length (lightest but inflexible)
Technique:
- Shorten for uphills
- Lengthen for downhills
- Use wrist straps properly
- Plant poles with each step
Expert Insight: Trekkers often skip trekking poles thinking they’re unnecessary for “fit people.” Then Day 3’s brutal descent to Wiñay Wayna destroys their knees. Even if you don’t use poles on flat ground, bring them for descents. Your knees will thank you.
Other Useful Accessories
Whistle:
- Emergency signaling
- Included on many backpack sternum straps
Duct Tape:
- Gear repair (torn tent, broken pole)
- Blister prevention (cover hotspots)
- Wrap 5-10 feet around trekking pole
Multi-tool or Knife:
- Not essential but handy
- Check size restrictions (small pocket knife OK)
Stuff Sacks:
- Organize gear by category
- Compression sacks for clothing
- Color-code for quick identification
Carabiners:
- Attach items to outside of pack
- Clip wet items to dry in sun
- 2-3 small carabiners useful
Ziplock Bags:
- Various sizes (quart, gallon, 2-gallon)
- Waterproof phone/camera
- Organize small items
- Pack out trash
Health, Hygiene & First Aid
Staying healthy on the trail requires proactive hygiene and smart medication management. For pre-existing condition screening, emergency evacuation logistics, and full first aid protocols, see our Inca Trail Health & Safety guide.
Toiletries Checklist
Biodegradable Soap:
- Multi-use: body, clothes, dishes
- Dr. Bronner’s or camping-specific brands
- Small travel bottle (2-3 oz)
Toothbrush & Toothpaste:
- Travel-size toothpaste
- Collapsible toothbrush
Toilet Paper:
- Half a roll in ziplock bag
- We provide some, but bring backup
- Pack out used TP in provided bags (Leave No Trace)
Hand Sanitizer:
- Small bottle (2-3 oz) in daypack
- Use before every meal, after bathroom
- Alcohol-based (60%+ alcohol)
Sunscreen:
- SPF 50+ mineral/physical sunscreen (reef-safe)
- 3-4 oz sufficient for 4 days
- Apply every 2 hours on exposed skin
- UV radiation 40% stronger at altitude
Lip Balm:
- SPF 30+ essential
- 2 sticks (one in daypack, one in duffel)
- Lips burn and crack badly at altitude
Deodorant (Optional):
- Travel-size stick
- Don’t expect to smell great (everyone’s in same boat)
Face Wipes:
- Unscented, biodegradable
- Quick “shower” when water scarce
- 6-8 wipes for 4 days
Menstrual Products (Women):
- Period can arrive unexpectedly at altitude
- Tampons/pads in waterproof bag
- Menstrual cup (compact, eco-friendly)
- Pack out all used products
Pee Funnel (Women):
- Allows standing urination
- Useful for middle-of-night bathroom trips
- Popular options: pStyle, Freshette, GoGirl
First Aid & Medications
Personal Prescriptions:
- Bring full 4-day supply + 2 extra days
- Keep in original labeled bottles
- Pack half in daypack, half in duffel (redundancy)
Altitude Sickness Prevention:
- Diamox (acetazolamide): 125mg twice daily for prevention
- Start 1 day before trek
- Prescription required (get from doctor)
- Side effects: tingling fingers, frequent urination, carbonated drinks taste flat
Pain Relief:
- Ibuprofen (anti-inflammatory for sore muscles)
- Acetaminophen/Paracetamol (headaches)
- 12-16 tablets sufficient
Digestive:
- Imodium (diarrhea – take if loose stool)
- Tums or antacids (altitude affects digestion)
- Avoid if possible (better to let bug pass)
Blister Treatment:
- Compeed blister patches (6-8 patches)
- Leukotape P (preventive taping)
- Moleskin (if blisters develop)
Antiseptic:
- Small tube antibiotic ointment
- Alcohol wipes or iodine pads
- For cuts, scrapes, blisters
Bandages:
- Assorted sizes adhesive bandages
- Gauze pads
- Athletic tape
Personal Medications:
- Any prescription drugs
- Allergy medications
- EpiPen if severe allergies
Important: Tour guides carry full first aid kits and are trained in wilderness first aid. Your personal kit is for minor issues (blisters, headaches, small cuts). For serious problems (severe altitude sickness, injuries, respiratory issues), notify your guide immediately.
Water Purification
Provided:
- Boiled water at every meal
- Fill bottles at breakfast/dinner
Personal Purification:
- Water purification tablets (backup)
- Iodine or chlorine dioxide tablets
- Aquamios or Micropur brands
- Bring 20-30 tablets
What to Avoid:
- Stream water without treatment (giardia risk)
- Tap water in Ollantaytambo
- Ice in drinks
Pro Tip: Altitude increases dehydration. Drink 4-5 liters daily, more on ascent days. Your urine should be pale yellow. Dark urine = dehydrated = increased altitude sickness risk.
Seasonal Packing Variations
The Inca Trail’s weather varies dramatically by season. Adjust your packing list accordingly.
Dry Season (May-September)
Weather:
- Daily temperature: 15-20°C (59-68°F)
- Night temperature: -5 to 5°C (23-41°F)
- Rain chance: 5-15% (brief afternoon showers)
- Conditions: Clear skies, dusty trails, intense sun
Packing Adjustments:
- Lighter sleeping bag OK (-4°C rating acceptable)
- Prioritize sun protection (more exposed time)
- Less emphasis on waterproofing
- Extra water capacity (drier, hotter)
Added Items:
- Extra sunscreen (reapply more often)
- Dust mask/buff (dusty trails)
- Larger water bottles
Can Leave Behind:
- Heavy waterproof pants (rain jacket sufficient)
- Extra waterproof layers
Rainy Season (October-April)
Weather:
- Daily temperature: 10-15°C (50-59°F)
- Night temperature: 0-8°C (32-46°F)
- Rain chance: 40-60% (heavy afternoon storms)
- Conditions: Muddy trails, slippery steps, low clouds
Packing Adjustments:
- Warmer sleeping bag essential (-10°C rating)
- Maximum waterproofing priority
- Quick-dry everything
- More plastic bags for wet items
Added Items:
- Waterproof rain pants (not optional)
- Extra ziplock bags
- Gaiters (keep mud out of boots)
- Waterproof gloves
Can Leave Behind:
- Lighter layers (cold + wet = need warmth)
Shoulder Season (April, October)
Weather:
- Unpredictable mix of dry and rainy
- Can experience both extremes in single day
Packing Strategy:
- Pack for worst-case scenario
- Full rain gear + warm sleeping bag
- Maximum flexibility in layering system
Monthly Temperature & Rain Guide:
| Month | Day Temp (°C) | Night Temp (°C) | Rain Chance | Sleeping Bag Rating |
|---|---|---|---|---|
| April | 15-18°C | 2-5°C | 30% | -10°C |
| May | 17-20°C | 0-3°C | 10% | -7°C |
| June | 18-21°C | -2 to 2°C | 5% | -10°C |
| July | 18-21°C | -2 to 2°C | 5% | -10°C |
| August | 18-21°C | -1 to 3°C | 8% | -7°C |
| September | 17-20°C | 1-5°C | 15% | -7°C |
| October | 16-19°C | 3-7°C | 35% | -5°C |
| November | 15-18°C | 4-8°C | 50% | -4°C |
Pro Tip: Check recent trek reports on forums (TripAdvisor, Reddit r/IncaTrailPeru) 2-3 weeks before your departure. Recent trekkers will report actual weather conditions, which can vary from historical averages due to climate change.
Cusco Gear Rental Guide
Renting gear in Cusco saves luggage space, reduces costs, and supports local businesses. Here’s how to rent smart.
Where to Rent
Top Rental Shops in Cusco:
- Tatoo Adventure Gear – Address: Calle del Medio 130, Cusco – Quality: Excellent (North Face, Mountain Hardwear brands) – Reservation: Recommended during peak season
- Peru Expeditions – Address: Avenida Garcilaso 210, Cusco – Quality: Good (mix of brands) – Walk-in: Usually available
- Wayki Trek – Address: Portal de Panes 123, Plaza de Armas – Quality: Variable (inspect carefully) – Note: Budget-friendly but quality varies
Rental Timing:
- Visit shops 2-3 days before trek
- Inspect gear carefully before committing
- Peak season (June-August): reserve in advance
Pro Tip: Rental prices vary by shop and season. For current sleeping bag, trekking pole, and sleeping pad rental rates, see our Inca Trail Camping Guide.
What to Rent vs Buy
Best Rental Items:
- Sleeping bags: excellent quality available, bulky to travel with
- Trekking poles: good selection, save luggage space
- Sleeping pads: inflatable pads available, awkward to transport
- Duffel bags: we often include, but rentals available
Better to Bring:
- Hiking boots: sizing critical, need broken-in pair
- Rain jacket: fit and features matter, wear on plane
- Headlamp: inexpensive, lightweight, pack in carry-on
- Clothing layers: personal fit essential
Gear Inspection Checklist
Sleeping Bags:
- Check zipper operation (no snags)
- Inspect for tears, holes, missing insulation
- Smell test (musty = poor storage)
- Ask about temperature rating
- Request stuff sack if not included
Trekking Poles:
- Test locking mechanisms (should be secure)
- Check tips (not worn down)
- Adjust to your height (works smoothly)
- Verify wrist straps included
Sleeping Pads:
- Inflate fully and check for leaks
- Test valve operation
- Feel for adequate thickness (1.5″+)
Important: Don’t accept subpar gear just because “it’s all they have.” If sleeping bag seems insufficient or poles are damaged, visit another shop. Your comfort and safety aren’t worth a small savings.
Rental Deposits & Returns
Deposit Requirements:
- Passport copy + credit card or cash deposit
- Typical deposit: $50-100 per item
- Returned when gear is returned undamaged
Return Process:
- Gear must be returned clean and dry
- Small wear acceptable, damage charged
- Return within 48 hours of trek end
- Late returns charged daily fees
Cost Comparison: Rent vs Buy
Renting for Single Trek:
For current sleeping bag, trekking pole, and sleeping pad rental rates in Cusco, see our Inca Trail Camping Guide. Renting all three items for one trek is consistently far cheaper than buying new gear.
Buying:
- Budget sleeping bag: $120
- Budget poles: $40
- Budget pad: $30
- Total: $190 + luggage fees/hassle
Verdict: Renting is the cheaper option for a single Peruvian trek even after accounting for deposits; buying only pays off if you’re planning multiple treks or future camping trips.
What NOT to Pack
Avoid these common packing mistakes that add unnecessary weight or won’t be usable.
Prohibited Items
- Plastic bottles: Not allowed in Machu Picchu sanctuary
- Single-use plastics: Environmental regulations
- Drones: Banned in Machu Picchu
- Trekking poles with metal tips at Machu Picchu: Rubber tips required
- Backpacks larger than 40L at Machu Picchu: Check oversized packs
Unnecessary Items
- Cotton clothing: Stays wet, causes hypothermia
- Jeans: Heavy, restrictive, terrible when wet
- Hair dryer/styling tools: No electricity, too heavy
- Full-size towel: Quick-dry travel towel or skip entirely
- Books: Heavy; download ebooks to phone
- Laptop/tablet: Leave at Cusco hotel
- Excessive clothing changes: 2-3 sets maximum
- Luxury toiletries: Travel size or share
- Tent: We provide tents
- Cooking gear: All meals provided
- Camp chair: No space, too heavy
- Pillow (full-size): Inflatable or stuff sack alternative
- Extra shoes beyond boots + camp sandals: Two pairs maximum
Common Packing Mistakes
Mistake #1: “Just in Case” Items Packing 5 pairs of socks “in case” when 3 suffices. Assess actual needs vs. theoretical scenarios.
Mistake #2: Brand-New Gear Testing gear for first time on trek. Break in all clothing and equipment beforehand.
Mistake #3: Over-Packing Layers Bringing 4 jackets when layering system needs 2-3. Trust the system.
Mistake #4: Excessive Toiletries Full bottles of shampoo, conditioner, lotion. Decant into 1oz containers or skip.
Mistake #5: “I’ll Lose Weight” Packing Packing pre-diet clothing sizes. Pack what fits now.
Pro Tip: Pack everything you think you need, then remove 20%. Lay it all out, critically assess each item: “Will I definitely use this?” If “maybe,” leave it out. You can survive 4 days with less than you think.
Packing Mistakes to Avoid
Learn from others’ errors to optimize your own packing strategy.
Top 15 Packing Mistakes
1. Overpacking the Duffel
- Mistake: Exceeding 7kg limit or packing to exactly 7kg
- Consequence: Repack at trailhead, stress porters, or lack buffer for wet items
- Solution: Target 5-6kg, leaving 1-2kg buffer
2. Underpacking Warm Layers
- Mistake: “I run hot” mentality, skipping puffy jacket
- Consequence: Shivering at 4,000m camps, poor sleep, increased altitude sickness risk
- Solution: Bring full layering system regardless of personal temperature preference
3. New, Unbroken Boots
- Mistake: Wearing boots for first time on trek
- Consequence: Catastrophic blisters, potential trek abandonment
- Solution: 50-100km break-in period mandatory
4. Inadequate Rain Gear
- Mistake: “It’s dry season, I don’t need rain pants”
- Consequence: Soaked, cold, miserable when afternoon storm hits
- Solution: Full rain gear (jacket + pants) regardless of season
5. Wrong Sleeping Bag Temperature Rating
- Mistake: Bringing 0°C bag when -10°C needed
- Consequence: Sleepless nights, exhaustion, inability to recover
- Solution: Research seasonal temperatures, choose bag rated 5-10°C colder
6. Overpacking Electronics
- Mistake: DSLR + 3 lenses + laptop + tablet
- Consequence: 3-4kg of gear, no charging, questionable use
- Solution: Phone + small camera OR single DSLR with 1-2 lenses
7. Cotton Everything
- Mistake: Cotton t-shirts, jeans, cotton socks
- Consequence: Wet = heavy + cold + chafing + never dries
- Solution: 100% synthetic or merino wool, zero cotton
8. Forgetting Headlamp
- Mistake: Assuming phone flashlight sufficient
- Consequence: Hands aren’t free, phone battery drains, darkness at 4 AM Day 4
- Solution: Dedicated headlamp with fresh batteries
9. Insufficient Sun Protection
- Mistake: Low SPF or small amount of sunscreen
- Consequence: Severe sunburn at altitude, painful peeling
- Solution: SPF 50+ reef-safe, 4oz minimum, reapply every 2 hours
10. No Backup Passport Protection
- Mistake: Single passport copy, no waterproofing
- Consequence: Soaked passport = denied entry, expensive emergency replacement
- Solution: Waterproof case + separate photocopy + digital copy
11. Overpacking Toiletries
- Mistake: Full-size shampoo, conditioner, lotion, etc.
- Consequence: 1-2kg of unnecessary weight
- Solution: Travel sizes only, share with group, skip non-essentials
12. Bringing Valuables
- Mistake: Expensive jewelry, designer clothes, irreplaceable items
- Consequence: Loss, theft, damage, constant worry
- Solution: Leave valuables at home or hotel safe
13. Inadequate Footwear
- Mistake: Only hiking boots, no camp shoes
- Consequence: Sweaty boots never dry, feet never air out
- Solution: Lightweight sandals or camp shoes essential
14. Wrong Backpack Size
- Mistake: 50L+ daypack for daily hiking
- Consequence: Temptation to overpack, excess weight, shoulder pain
- Solution: 25-30L daypack forces efficient packing
15. Not Testing Gear
- Mistake: Buying/renting gear without trial
- Consequence: Discovering issues on trail (leaky sleeping pad, uncomfortable pack)
- Solution: Test all gear on pre-trek hike
Expert Insight: The most common mistake isn’t any single item. It’s the cumulative effect of “just one more thing.” Each “small” addition (extra shirt, backup shoes, luxury item) compounds. Discipline yourself: if you didn’t use it on training hikes, you won’t use it on the Inca Trail.
Pre-Trek Gear Testing Checklist
Don’t discover gear problems on the trail. Test everything beforehand.
Testing Timeline
4-6 Weeks Before Trek: □ Test sleeping bag on cold night (similar temps to trek) □ Break in hiking boots (50km minimum) □ Test rain gear in shower (check for leaks) □ Load and wear daypack with weight for 4+ hours □ Wear hiking clothes on training hike (check for chafing) □ Test headlamp batteries and brightness settings □ Charge power bank, test device charging cycles □ Try on all layers together (ensure compatibility)
2-3 Weeks Before Trek: □ Full gear shakedown hike (8+ hours with all equipment) □ Test sleeping pad for leaks (inflate overnight) □ Practice packing/unpacking duffel efficiently □ Verify all gear fits in luggage for travel □ Test trekking pole adjustments and locks □ Apply sunscreen for 8 hours (check for skin reactions) □ Wear hiking socks with boots (check for blisters)
1 Week Before Trek: □ Final gear inventory (checklist verification) □ Replace worn items (sock holes, broken zippers) □ Waterproof electronics (test ziplock seal) □ Organize gear by category (stuff sacks) □ Identify items for carry-on vs checked luggage □ Take photos of all gear (insurance documentation)
24 Hours Before Trek: □ Full duffel pack (weigh to confirm under 7kg) □ Daypack organization (practice quick access) □ Charge all electronics (100% battery) □ Fill any prescriptions (Diamox, personal meds) □ Pack passport in waterproof case □ Prep cash in small bills for tips
Gear Shakedown Hike
Purpose: Identify issues before trek when fixes are easy.
How:
- Choose 8-12km hike with 500-800m elevation gain
- Pack daypack exactly as you will for trek
- Wear hiking boots, full clothing system
- Test rain gear if weather cooperates
- Note any discomfort, chafing, blisters, or gear failures
What to Assess:
- Boot comfort after 2-3 hours (hot spots?)
- Pack weight (too heavy?)
- Layer system effectiveness (too hot/cold?)
- Trekking pole technique and usefulness
- Hydration needs (how much water required?)
- Snack preferences (what actually tastes good while hiking?)
Pro Tip: Do your gear shakedown hike at altitude if possible (2,500m+). Your body responds differently to exertion at elevation. What feels great at sea level might feel terrible at altitude.
Downloadable Packing Checklist
Master Packing List: Inca Trail 2026
Essential Clothing
Upper Body: □ 3x Moisture-wicking base layer shirts (long-sleeve) □ 1x Fleece mid-layer jacket □ 1x Insulated puffy jacket (down or synthetic) □ 1x Waterproof rain jacket □ 1-2x T-shirts (optional, for hot sections)
Lower Body: □ 2x Hiking pants or leggings □ 1x Waterproof rain pants □ 1x Base layer bottoms (thermal leggings) □ 1x Shorts (optional)
Undergarments: □ 4x Underwear (moisture-wicking) □ 2-3x Sports bras (women) □ 4x Hiking socks (merino wool or synthetic) □ 1x Liner socks (optional, blister prevention)
Head, Hands, Neck: □ 1x Sun hat (wide-brimmed or baseball) □ 1x Warm beanie □ 1x Neck gaiter or buff □ 1x Gloves (lightweight insulated)
Footwear: □ 1x Hiking boots (broken in) OR trail runners □ 1x Camp shoes (sandals or light shoes)
Sleeping Gear
□ Sleeping bag (-10°C to -4°C rating, depending on season) □ Sleeping bag liner (optional, adds warmth) □ Sleeping pad (inflatable or foam) □ Pillow (inflatable or stuff sack alternative)
Backpacks
□ Daypack (25-35L with rain cover) □ Duffel bag or compression stuff sacks for porter bag
Essential Accessories
Lighting: □ Headlamp + extra batteries
Trekking: □ Trekking poles (optional but recommended)
Hydration: □ 2-3L water capacity (bladder or bottles) □ Water purification tablets (backup)
Sun Protection: □ Sunscreen SPF 50+ (reef-safe) □ Lip balm with SPF □ Sunglasses (UV400 protection)
Navigation/Safety: □ Whistle □ Small multi-tool or knife
Organization: □ Stuff sacks (various sizes) □ Ziplock bags (multiple sizes) □ Trash bags (pack out waste)
Electronics
□ Phone + charger □ Power bank (10,000-20,000mAh) □ Camera + extra batteries (optional) □ Memory cards
Documents & Money
□ Passport (original + photocopy) □ Student ID (if applicable) □ Travel insurance documentation □ Permit confirmation (provided by us) □ Cash: 250-400 Peruvian soles + $50-100 USD
Toiletries & Hygiene
□ Biodegradable soap (small bottle) □ Toothbrush + toothpaste (travel-size) □ Toilet paper (half roll in ziplock) □ Hand sanitizer (2-3oz) □ Deodorant (optional, travel-size) □ Face wipes (6-8 wipes) □ Menstrual products (women) □ Pee funnel (women, optional)
First Aid & Medications
□ Personal prescriptions (4-day supply + extra) □ Diamox for altitude (if using) □ Ibuprofen/acetaminophen (pain relief) □ Imodium (diarrhea treatment) □ Tums or antacids □ Blister treatment (Compeed patches, Leukotape) □ Antiseptic ointment □ Adhesive bandages (assorted sizes)
Extras & Optional
□ Notebook + pen □ Book or Kindle (lightweight) □ Playing cards □ Earplugs (for snoring tent mates) □ Duct tape (small amount wrapped around pole) □ Carabiners (2-3 small)
Weight Targets by Category
| Category | Target Weight | Notes |
|---|---|---|
| Clothing | 2.5-3.5kg | Wear heaviest items during travel |
| Sleeping System | 1.8-3.5kg | Rent vs buy decision |
| Accessories | 0.8-1.2kg | Headlamp, poles, water bottles |
| Toiletries | 0.3-0.5kg | Travel sizes only |
| Electronics | 0.4-0.8kg | Minimize if possible |
| Duffel Total | 5.0-6.5kg | Target 6kg max (1kg buffer) |
Daypack Target: 3-5kg (water, snacks, layers, camera, personal items)
Conclusion: Your Trek Starts with Smart Packing
Key Packing Principles to Remember:
- Respect the 7kg limit: Ethical porter treatment starts with efficient packing
- Test everything beforehand: Discover gear problems at home, not on Dead Woman’s Pass
- Layer strategically: Base + mid + outer layers adapt to temperature changes
- Prioritize essentials: Broken-in boots, proper sleeping bag, rain gear, and sun protection are non-negotiable
- Rent smart: Cusco offers excellent gear rental for sleeping bags, poles, and pads
- Pack for worst case: Weather is unpredictable, so prepare for rain even in dry season
Finalizing Your Gear
Next Steps:
- Download this packing list for reference during shopping and packing
- Research Cusco rental shops if planning to rent gear (book 2-3 days before trek)
- Schedule gear shakedown hike 4-6 weeks before departure
- Create your personal checklist based on season and preferences
- Start breaking in boots NOW if you haven’t already
The Inca Trail rewards preparation. Pack to this list and you’re covered for scorching sun, freezing nights, and afternoon storms, right up to the moment you first glimpse Machu Picchu through the Sun Gate.
Related Articles
- Inca Trail: The Complete Guide
- Inca Trail Training Plan: 12 Weeks to Dead Woman’s Pass
- Inca Trail Permit Availability
- Best Time to Hike the Inca Trail Isn’t Always June
- Inca Trail Itinerary Day by Day: 42km, Hour by Hour
- Inca Trail Cost 2026: $600 to $4,000, Broken Down by Tier
- Altitude Sickness in Peru: A Destination-by-Destination Guide
- Inca Trail 4 Days: Classic Trek to Machu Picchu
- Peru Trekking Packing List: Gear for Every Andes Route
About This Guide: This Inca Trail packing list was last updated August 2026 and reflects current gear recommendations, rental prices in Cusco, and Peruvian porter welfare regulations. Gear technology and weather patterns evolve, so always verify specific items with us before departure.
Disclaimer: This guide provides general packing recommendations. Individual needs vary based on personal cold tolerance, fitness level, medical conditions, and seasonal timing. Consult your doctor regarding altitude medication (Diamox) and ensure your travel insurance covers high-altitude trekking and helicopter evacuation.