
Introduction
Six months before my first Inca Trail trek, I thought I was prepared. I’d read blog posts, watched YouTube videos, and bought expensive hiking boots. Three hours into Day 1, those boots had destroyed my heels, I was gasping for breath despite months of training, and I realized my “waterproof” jacket wasn’t waterproof at all.
Fast forward through five Inca Trail completions, three years guiding groups, and conversations with hundreds of trekkers, and I’ve identified the specific tips that separate miserable treks from good ones. The difference isn’t how fit you are or how much money you spend. It’s knowing which details actually matter and which common advice is outdated or wrong.
These 20 tips for first-time Inca Trail hikers are organized by timeline (6 months before through post-trek): booking strategy with month-by-month permit availability, training methods that actually work at altitude, acclimatization protocols from Cusco doctors, gear choices that prevent 90% of common problems, money and tipping breakdowns down to the sol, porter relationship ethics, mental preparation frameworks, photography basics, and post-trek recovery advice that helps you actually enjoy Machu Picchu instead of limping through it.
Quick Answer: Essential Inca Trail tips include: (1) Book 6-8 months ahead for peak season, (2) Train with weighted pack on stairs for 12+ weeks, (3) Arrive in Cusco 2-3 days early for acclimatization, (4) Break in boots for 50+ miles before trek, (5) Bring your passport, no exceptions, (6) Pack Diamox after doctor consultation, (7) Budget $150-200 beyond tour cost for porter/guide/cook tips plus other trail extras (tips alone typically run $40-80 per trekker on a 4-day trek), (8) Confirm porter welfare compliance before you book, (9) Use trekking poles to save knees on descents, (10) Prepare mentally for basic facilities and physical challenge.
Table of Contents
- Timeline-Based Planning Strategy
- Booking and Permit Tips
- Training and Fitness Preparation
- Acclimatization Protocols
- Gear Selection That Matters
- Money, Tipping, and Budget Guide
- Altitude Sickness Prevention
- Mental Preparation Strategies
- Porter Relationships and Ethics
- Photography and Documentation
- Food and Hydration Strategy
- Group Dynamics Management
- Post-Trek Recovery
- Technology and Communication
- Conclusion
Timeline-Based Planning Strategy
6 Months Before Trek
Primary tasks:
- Book your trek: Peak season (June-August) sells out 5-6 months in advance
- Purchase flights: International flights to Lima, domestic to Cusco
- Start training program: 12-18 weeks minimum for proper conditioning
- Consult doctor: Discuss Diamox prescription, vaccinations, fitness clearance
- Read trek reviews: Compare ethical standards and porter welfare practices
Pro Tip: Book tour and flights separately unless you find a package deal that’s genuinely cheaper. Flights change prices constantly, so use Google Flights price alerts to catch deals to Lima ($400-700 from US depending on season).
3 Months Before Trek
Primary tasks:
- Intensify training: Add weighted pack (15-20 lbs) to hikes
- Test all gear: Boots should have 50+ miles before trek
- Book Cusco accommodations: 2-3 nights pre-trek, 1 night post-trek
- Arrange travel insurance: Must cover high-altitude trekking (many policies exclude above 4,000m)
- Get vaccinations: Hepatitis A, typhoid, yellow fever (if visiting jungle afterward)
1 Month Before Trek
Primary tasks:
- Finalize packing list: Purchase any missing gear
- Break in boots: Should feel like extensions of your feet
- Peak fitness training: Final long hikes with full pack
- Arrange work coverage: 7-10 days minimum (5 for trek + travel days)
- Download offline maps: Maps.me or Gaia GPS with Peru maps
1 Week Before Trek
Primary tasks:
- Fly to Lima/Cusco: Build in buffer days for flight delays
- Begin acclimatization: 2-3 days in Cusco minimum (3-4 better)
- Attend pre-trek briefing: Usually evening before trek starts
- Pack duffel bag: 7kg maximum, weigh it to verify
- Rest and hydrate: Avoid alcohol, drink 3-4L water daily
Day Before Trek
Primary tasks:
- Pre-trek briefing: Meet guide, confirm details, ask questions
- Early dinner: Carb-load, avoid alcohol, sleep by 9 PM
- Prepare daypack: Water, snacks, layers, camera, documents
- Charge all devices: May not charge again for 4 days
- Set multiple alarms: Early pickup (usually 4:00-5:00 AM)
Booking and Permit Tips
When to Book by Season
The hack that matters most: book by season, not by date. Peak season (June-August) permits vanish 5-6 months out, often before you’ve finished comparing dates and prices. Shoulder season (April-May, September-October) needs 3-4 months’ lead time. Low season (November-January, March) can sometimes be booked just 4-6 weeks ahead, and February closes entirely for trail maintenance.
Permits are limited and sell out fast. See how the permit system actually works. For what each season costs to trek (tour tiers, weather trade-offs, crowd levels), see our complete cost breakdown.
Signs of an Ethical Trek Company
Non-negotiable checklist:
- Porter law compliance (20kg maximum load)
- Porter insurance and proper equipment provided
- Transparent pricing (no hidden fees)
- Licensed and registered with Peruvian authorities
- English-speaking certified guides (or language of your choice)
- Established office in Cusco (not just website)
- Recent reviews (check Google, TripAdvisor, Facebook)
Red flags:
- Prices well below market rate for the season (a red flag, not a deal)
- No clear porter welfare policy
- Poor reviews mentioning mistreated porters
- Unlicensed guides or fake certifications
- High-pressure sales tactics
- No physical office or meeting point
Expert Insight: The cheapest quote is rarely the best value. Budget-priced tours often cut corners on porter welfare, food quality, and safety equipment, while paying a bit more midrange typically buys better porter treatment, newer equipment, guides with more years on the trail, and better meals. For exact price tiers, see the full cost breakdown.
Training and Fitness Preparation
Realistic Fitness Requirements
This is the quick version. For the full 12-week program, phase by phase, see our Inca Trail training guide.
Minimum capability needed:
- Hike 6-8 hours per day with 10 lb daypack
- Handle 1,200m elevation gain in one day
- Function at 4,000m+ altitude
- Walk on uneven terrain and stairs for extended periods
This is NOT an extreme mountaineering expedition, but it’s also not a casual walk. The combination of altitude, distance (42km over 4 days), and elevation gain (approximately 3,600m cumulative) challenges even fit hikers.
12-Week Training Program
Four phases over 12 weeks: base building (weeks 1-4, no pack), intensity building (weeks 5-8, 10-15 lb pack, stair work), and peak-and-taper (weeks 9-12, up to 20 lb pack, back-to-back long hikes). See our 12-week Inca Trail training plan for the full week-by-week breakdown.
Exercises That Matter Most
Leg strength:
- Squats and lunges (body weight + weighted)
- Step-ups on high platform (12-18 inches)
- Calf raises (prevents shin splints)
Core stability:
- Planks (front and side variations)
- Dead bugs and bird dogs
- Anti-rotation exercises (Pallof press)
Balance and proprioception:
- Single-leg stands on unstable surface
- Single-leg deadlifts
- Ankle mobility exercises
Acclimatization Protocols
Why Acclimatization Matters
Cusco sits at 3,400m (11,150 ft), higher than most ski resorts. The Inca Trail reaches 4,215m (13,828 ft) at Dead Woman’s Pass. Without proper acclimatization, you risk altitude sickness ranging from uncomfortable headaches to life-threatening pulmonary or cerebral edema.
The 2-3 Day Cusco Protocol
Spend 2-3 days in Cusco (3,400m) before the trek: rest and hydrate on day 1, light activity below 3,500m on day 2, and an optional acclimatization hike above 3,700m on day 3. Flying in and starting the trek the next day is possible but raises altitude-sickness risk substantially.
Diamox (Acetazolamide) Strategy
Many guides recommend Diamox (typically 125mg twice daily, started 1-2 days before ascent and tapered off) alongside acclimatization, not instead of it. Talk to your doctor about dosing and contraindications (pregnancy, sulfa allergy, certain kidney conditions). For the full protocol, side effects, and prevention strategy, see our altitude sickness in Peru guide.
Gear Selection That Matters
The Big 3: What Actually Matters
Three gear choices make or break your trek: boots broken in over 50+ miles, a sleeping bag rated to at least -10°C (14°F), and a rain jacket that’s genuinely waterproof, not just water-resistant (afternoon showers hit even in dry season). Get exact recommendations, weights, and Cusco rental prices for every item in our complete packing checklist.
Pro Tip: Buy boots a half-size larger than normal and break them in wearing your actual trek socks, because feet swell on long descents and boots that feel great in the store with thin socks cause blisters on trail with thick wool ones.
Money, Tipping, and Budget Guide
Budget Realistically
Total trip cost (tour fees, Cusco lodging, meals, tips, and any gear rental) ranges from budget to luxury/glamping tours, and it adds up fast beyond the headline tour price. Rather than repeat the full number-by-number breakdown here, see our complete Inca Trail cost guide for exact tour tiers, lodging ranges, and a line-by-line realistic budget.
Tip Smart, Not Just Generously
Guides, cooks, lead porters, and porters are tipped separately by role, pooled and distributed at the goodbye ceremony on Night 3. See our cost breakdown for current per-role sol amounts. What matters more than the exact numbers: bring small-denomination sol notes (10s and 20s) in individual envelopes prepared before the trek, and agree on amounts with your group ahead of time.
Pro Tip: Pre-filled envelopes make the ceremony faster and more dignified than counting out cash publicly in front of the crew who just carried your gear for four days.
Money Logistics
What to bring on trail:
- 200-300 soles in small bills (snacks, beer, souvenirs at camps)
- Small amount USD ($20-40 as emergency backup)
- One credit card (buried in pack for true emergencies)
What to leave in Cusco:
- Bulk of cash and credit cards (hotel safe)
- Passport copy (bring original on trail)
- Excess electronics and valuables
Currency exchange:
- Exchange USD or Euros to soles in Cusco (better rates than Lima airport)
- ATMs widely available in Cusco (withdraw soles directly)
- US dollars accepted some places but poor exchange rate
- Credit cards accepted in major establishments (not on trail)
Altitude Sickness Prevention
Understanding AMS (Acute Mountain Sickness)
This covers AMS at a glance. For prevention and Diamox dosing in more depth, see our altitude sickness in Peru guide; for Inca-Trail-specific evacuation logistics and pre-existing-condition screening, see our Inca Trail health and safety guide.
Mild symptoms (headache, fatigue, nausea, dizziness) are common and usually manageable with rest and hydration; confusion, inability to walk, or breathing difficulty at rest are medical emergencies. Descend and get help immediately.
Prevention Strategies
Hydration (most important):
- Drink 4-5L water daily (yes, this much)
- Urine should be clear to pale yellow
- Don’t wait until thirsty (thirst is delayed at altitude)
- Electrolyte supplements help (Gatorade, Nuun, DripDrop)
Slow ascent profile:
- Cusco acclimatization (2-3 days) before trek
- Trek naturally follows “climb high, sleep low” principle
- Day 1: Sleep at 3,000m
- Day 2: Cross 4,215m pass, sleep at 3,600m
- Day 3: Sleep at 2,650m (lower = recovery)
Medication:
- Diamox (discussed earlier, the most effective prevention)
- Ibuprofen for headache (also reduces inflammation)
- Avoid sleeping pills (depress breathing at altitude)
Lifestyle factors:
- No alcohol 48 hours before and during trek
- Avoid heavy meals (digestion requires oxygen)
- Coca tea (mild benefit, cultural tradition)
- Deep breathing exercises
- Positive mental attitude (stress worsens symptoms)
Critical Warning: If symptoms worsen despite rest and medication, descend immediately. Altitude sickness can progress to life-threatening conditions (HAPE, HACE) within hours. Don’t be a hero. Tell your guide and descend. You can try again later.
Mental Preparation Strategies
Managing Expectations
Reality vs. Instagram:
- You will be uncomfortable (accept this)
- Bathrooms are squat toilets (they get worse daily)
- No showers for 4 days (everyone is equally grimy)
- Sleep quality is poor (altitude and cold)
- Day 2 is brutally hard (everyone struggles)
- Weather can be unpredictable (rain even in dry season)
BUT ALSO:
- You’re hiking ancient Inca pathways (surreal privilege)
- The archaeological sites hold their own (Wiñay Wayna rivals Machu Picchu)
- Group bonding is real (shared adversity creates friendships)
- You’ll be proud of it (you crossed a 4,215m pass on foot)
- Arriving at Machu Picchu through the Sun Gate makes the effort worth it
Coping Strategies for Hard Moments
When Dead Woman’s Pass feels impossible (everyone has this moment):
- Break the climb into 10-minute segments (“just get to that rock”)
- Pole-pole (Swahili for “slowly-slowly”): speed doesn’t matter
- Watch porters carrying up to 20kg pass you, and take inspiration
- Focus on breathing (in through nose, out through mouth)
- Remember why you signed up for this adventure
When you’re freezing at 3 AM at Pacaymayo:
- Everyone in camp is also cold and awake
- This is temporary: tomorrow you descend to a warmer camp
- The discomfort is part of the story you’ll tell for years
- Put on every layer you brought, do jumping jacks in tent
When you question why you’re doing this:
- You’re on a trail most people only ever see in photos
- Discomfort is temporary, regret of quitting is permanent
- Your future self will be grateful you pushed through
- The sunrise at Machu Picchu makes everything worth it
Pro Tip: Bring photos of family or loved ones. During hard moments, look at them and remember you’re doing this for a reason. Many trekkers carry a small inspirational object or note. It sounds cheesy but works when you’re suffering.
Porter Relationships and Ethics
Understanding Porter Life
The reality:
- The legal minimum pay is S/165 a day in 2026 (Ley 31614)
- Tips significantly increase income (essential part of compensation)
- Many porters support families in rural villages
- This is demanding physical work at dangerous altitude
- Some porters do 2-3 treks per month (income varies seasonally)
Porter law protections (Ley 31614, 2022):
- Maximum load: 20kg for men, 15kg for women
- Minimum age: 18 years old
- Insurance provided
- Proper equipment provided (tent, sleeping bag, meals)
- Dignified treatment mandated
Reality check: These rules only protect porters if they’re actually enforced. Ask specifically how porter welfare is upheld before you book.
Building Respectful Relationships
What to do:
- Learn porter names (ask guide for introductions)
- Say “buenos días” and “gracias” when you see them
- Offer to share snacks during breaks (they often decline but appreciate gesture)
- Ask permission before photographing
- Learn basic Quechua phrases (many porters’ first language)
- Attend goodbye ceremony (emotional and important)
- Tip generously if service was good
What NOT to do:
- Don’t treat porters as servants or invisible
- Don’t complain about porter speed or schedule (they work hard)
- Don’t put more than 7kg in duffel (bags are weighed before departure)
- Don’t ask porters to carry additional items during hike
- Don’t take photos without asking
- Don’t skip tipping (this is essential income)
Basic Quechua phrases:
- Sulpayki (sool-PIE-kee) = Thank you
- Allianchu (ah-yahn-CHOO) = Hello/How are you?
- Paqarin = Tomorrow
- Imaynam = Good/Very well
Expert Insight: The goodbye ceremony on Night 3 is surprisingly emotional. These men carried your belongings, set up your shelter, cooked your meals, and made the trek possible. Many porters walk overnight after the ceremony to return home, a final act of endurance. Show genuine gratitude and tip appropriately.
Photography and Documentation
Essential Gear
A smartphone or mirrorless camera, a couple of charged power banks, and a dry bag or waterproof case cover most trekkers, so skip the heavy DSLR kit. These are the basics; for camera settings by lighting scenario, gear tiers, and a full 4-day shot list, see our Inca Trail photography guide.
Best Photography Moments
Day 1:
- Km 82 starting gate (traditional group photo)
- Llactapata ruins (first archaeological site)
- Sunset at Wayllabamba camp
Day 2:
- Summit of Dead Woman’s Pass (4,215m, a tough photo but an essential one)
- Runkurakay ruins (circular structure)
- Mountain valleys and vistas
Day 3 (best photography day):
- Phuyupatamarca ruins and terraces at sunrise
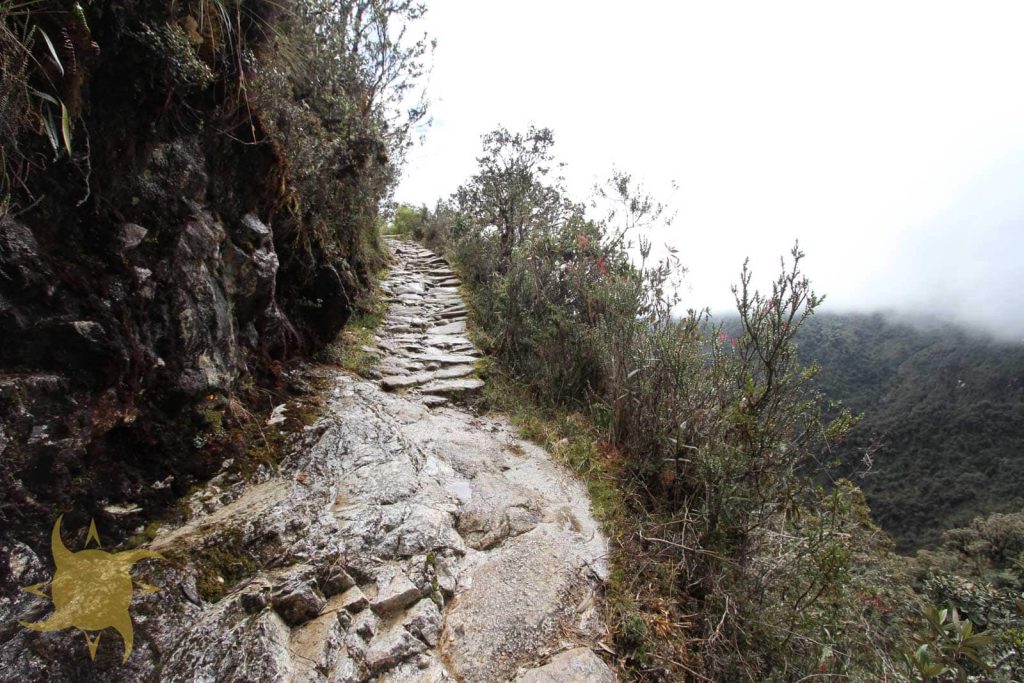
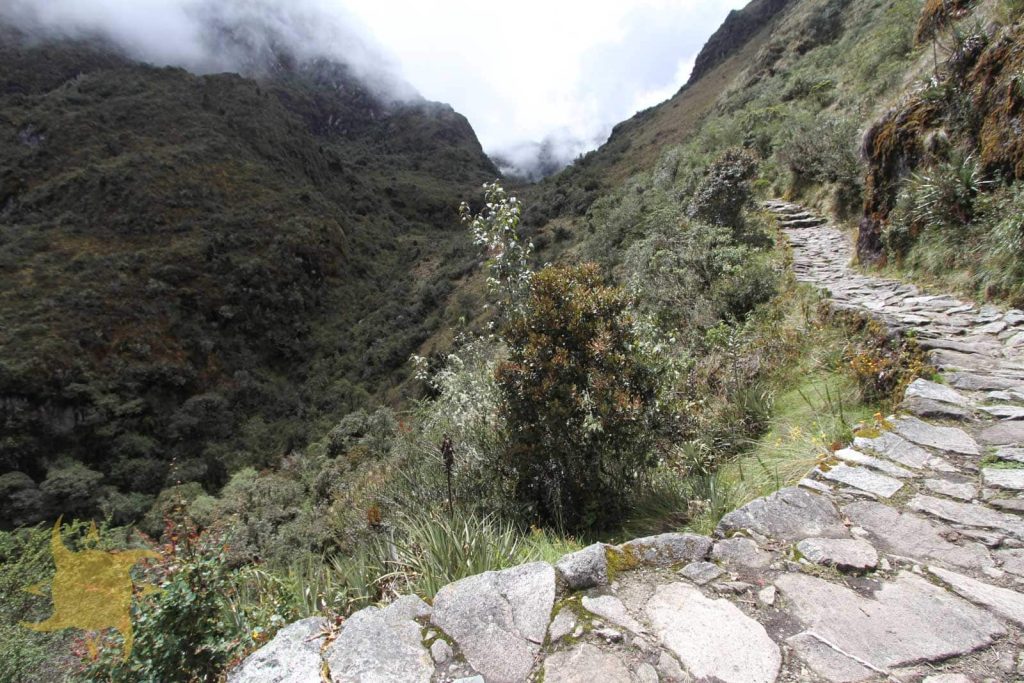
- Inca Trail stone stairways
- Wiñay Wayna ruins in afternoon golden hour
Day 4:
- Sun Gate sunrise (arrive early for best light)
- First panoramic Machu Picchu view through Sun Gate
- Classic postcard angles at Machu Picchu
Pro Tip: Wake up 30 minutes early on Day 3 to photograph Phuyupatamarca at sunrise. Most groups rush through here in early morning darkness. If you have energy, it’s the most photogenic ruin besides Machu Picchu itself.
Protecting Equipment
Challenges:
- Dust on trail (constant)
- Rain during any season
- Cold (battery drain)
- Physical bumps and drops
Solutions:
- Dry bag or waterproof camera bag
- Keep camera in daypack (not dangling around neck while hiking)
- Spare batteries in warm pocket (body heat maintains charge)
- Backup: Use phone as second camera
- Consider insurance for expensive equipment
Food and Hydration Strategy
Water Management
Daily intake target: 4-5 liters
Water sources:
- Porters provide boiled/purified water at meals (fill bottles)
- Some camps have fill stations
- Natural streams exist but MUST be treated (not recommended)
Purification methods:
- Chemical tablets (iodine or chlorine dioxide)
- UV purifier (SteriPEN)
- Filter pump (heavy, usually unnecessary)
- Trust the provided purified water (most reliable)
Carrying strategy:
- 2-3L capacity total (two 1L bottles or 3L hydration bladder)
- Drink consistently throughout day (not just at breaks)
- Add electrolyte powder for flavor and sodium
Meal Timing and Nutrition
Typical daily schedule:
- 6:00 AM: Coffee/tea in tent
- 7:00 AM: Breakfast (eggs, porridge, bread, fruit)
- 11:00 AM-12:00 PM: Snack break (trail mix, cookies, fruit)
- 1:00-2:00 PM: Lunch (3-course meal if lunch stop, or boxed lunch)
- 5:30 PM: Arrival snack (tea, popcorn, cookies)
- 7:00 PM: Dinner (soup, main course, dessert)
Snacks to bring:
- Energy bars (5-6 for the trek)
- Trail mix or nuts
- Chocolate or candy (instant energy)
- Electrolyte powder or tablets
- Hard candies (for altitude headaches, since sugar helps)
Pro Tip: At altitude, appetite decreases but nutrition is critical. Force yourself to eat even if not hungry. Carbohydrates digest easiest at altitude, so focus on bread, rice, pasta and potatoes. Protein is harder to digest, so don’t overload on meat.
Group Dynamics Management
Typical Group Composition
Size: 10-16 trekkers per group (plus 2 guides, 3-5 porters, 1 cook)
Demographics:
- Ages: 20s-60s (wide range)
- Fitness levels: Highly variable
- Solo travelers: 30-40% of most groups
- Couples: 40-50%
- Small groups: 10-20% (families or friend groups)
- Nationalities: International mix
Social Survival Guide
Making connections:
- Introduce yourself properly (not just names, share why you’re here)
- Offer to share sunscreen, blister pads, snacks
- Take photos for others (ask first)
- Join card games or conversations after dinner
- Help slower hikers without being condescending
Managing different paces:
- Don’t feel pressured to keep up with fastest hikers
- Don’t judge slower hikers (altitude affects everyone differently)
- Hike your own pace. Guides accommodate all speeds
- Regroup at break points and camp
- It’s a trek, not a race
Dealing with difficult personalities:
- Complainers: Avoid engaging, and don’t feed negativity
- Over-sharers: Politely excuse yourself to “use bathroom”
- Competitive types: Ignore the pace pressure
- Quiet loners: Respect their preference for solitude
For solo travelers:
- Most groups are welcoming to solo trekkers
- You’ll likely share a tent with another solo traveler (same gender)
- This is one of the best trips to do solo (instant friend group)
- Some people prefer solitude, and that’s okay too
Pro Tip: Bring a deck of cards or compact travel game to share. Post-dinner hours stretch long when darkness falls at 7:00 PM and you can’t sleep until 9:00-10:00 PM. Games become social glue and pass time enjoyably.
Post-Trek Recovery
Day 4 Evening (Post-Machu Picchu)
Your body at this point:
- Knees and legs completely destroyed
- Feet covered in blisters
- Sleep-deprived (14-18 hours deficit)
- Altitude-affected (just descended from 2,400m to 2,040m)
- Emotionally exhausted but exhilarated
Priorities in Aguas Calientes:
- SHOWER (first in 4 days, best shower of your life)
- Eat real meal in restaurant (celebrate!)
- Light walking (loosen stiff muscles)
- Early sleep (8:00-9:00 PM recommended)
- Prepare for return to Cusco tomorrow
Days 5-6 (Back in Cusco)
Physical recovery:
- Light walking only (explore Cusco gently)
- Epsom salt bath if available (helps muscle soreness)
- Massage (worth the $30-50, with many spas in Cusco)
- Stretching and foam rolling
- Sleep as much as possible
Nutrition:
- Celebrate with a nice meal (you earned it)
- Rehydrate heavily (altitude + physical exertion depletes fluids)
- Fresh fruits and vegetables (you missed these)
- Limit alcohol first day back (let body recover first)
Foot care:
- Drain blisters if needed (sterilize needle, leave skin intact)
- Air out feet (wear sandals)
- Antibiotic ointment on any open wounds
- Fresh socks daily (prevent infection)
Processing the Experience
Emotional aftermath (very common):
- Post-trek blues (adventure is over, back to normal life)
- Deep satisfaction and pride
- Stronger connection to trekking companions
- Immediate planning of next adventure (Inca Trail is gateway drug to trekking)
Preserving memories:
- Organize photos while details are fresh
- Journal about the experience (emotions fade)
- Share stories with friends and family
- Connect with trek mates on social media
- Leave us an honest review
Expert Insight: Many trekkers report post-adventure depression after returning home. The intensity of the experience and abrupt return to routine creates emotional letdown. This is normal. Plan something to look forward to, stay connected with trek mates, and give yourself permission to feel whatever emotions arise.
Technology and Communication
Phone Signal on Trail
Reality check:
- Day 1: Minimal to no signal after Km 82
- Day 2: No signal (too remote and high)
- Day 3: Occasional signal at Wiñay Wayna (unreliable)
- Day 4: Signal returns at Machu Picchu
Strategy: Plan to be offline for 3 full days. Tell family/friends beforehand. Enjoy the digital detox. It’s part of the experience.
Charging Devices
On trail:
- No reliable charging until Aguas Calientes
- Wiñay Wayna has paid charging (10-20 soles, slow, often broken)
- Solar chargers work but add weight
Best solution:
- Portable battery pack (20,000 mAh charges phone 4-5 times)
- Charge all devices fully night before trek
- Use airplane mode to conserve battery
- Only take photos/videos when it matters (not every step)
Offline Apps to Download
Essential:
- Maps.me (offline trail maps)
- Google Maps (download Cusco/Sacred Valley offline)
- Google Translate (download Spanish offline)
- Weather app (download Cusco weather)
- Kindle or audiobooks (for tent time)
Nice to have:
- Altitude tracker app (monitors elevation)
- Star map app (identify constellations at night)
- Plant/bird identification apps (educational)
Conclusion
The Inca Trail tests more than your legs: physical endurance, mental resilience, adaptability to discomfort, and openness to profound experiences. The tips in this guide come from hundreds of treks, countless mistakes (both mine and others’), and lessons learned from guides who’ve led this trail thousands of times.
The single most important insight: preparation matters more than natural ability. The fittest trekker who skips acclimatization will suffer more than the moderately fit person who follows protocols. The expensive boots worn without break-in cause more blisters than cheap boots properly broken in. The person who books last-minute for peak season misses out entirely, while the planner who books 6 months ahead gets the dates they want at better prices.
Key Takeaways:
- Book early: 6-8 months for peak season, 3-4 months for shoulder season
- Train properly: 12+ weeks with weighted pack and stair work
- Acclimatize seriously: 2-3 days in Cusco minimum, no exceptions
- Porter welfare matters: Confirm compliance before you book, no exceptions
- Bring original passport: Copies not accepted at checkpoints
- Budget realistically: $1,000-2,000 total including tour, accommodation, tips, and extras
- Prepare mentally: Accept discomfort, which is part of the experience
- Tip generously: Porters make this trek possible
- Stay flexible: Weather, altitude, and trail conditions vary, so adapt
- Remember why you’re here: When it gets hard (and it will), focus on the privilege of walking an original Inca road
Next, read about detailed day-by-day itinerary expectations, explore our complete packing checklist, understand how the permit system and booking windows work, or start with our complete Inca Trail planning guide.
Related Articles
- Inca Trail Itinerary Day by Day: 42km, Hour by Hour
- Inca Trail Permit Availability
- Inca Trail Packing List 2026: 27 Essentials Under 7kg
- Best Time to Hike the Inca Trail Isn’t Always June
- Inca Trail vs Salkantay: Which Trek Should You Choose?
- Dead Woman’s Pass: What to Expect on Day 2
- Inca Trail 4 Days: Classic Trek to Machu Picchu
About This Guide: This tip compilation was last updated on August 4, 2026, drawing from 30+ completed Inca Trail treks, interviews with licensed guides and porters, and feedback from 500+ trekkers. For official regulations and permits, consult the Peruvian Ministry of Culture.