
Introduction
The classic Inca Trail route spans 42 kilometers (26 miles) through diverse ecosystems, ascending from 2,400m to 4,215m at its highest point, Dead Woman’s Pass.
This guide breaks down the 4-day Inca Trail itinerary day by day: route, timing, physical challenges and highlights, with precise elevation profiles, campsite details, daily packing requirements, and first-hand insights from our guides.
Quick Answer: The 4-day Classic Inca Trail covers 42km (26 miles) with three nights of camping. Day 1 is moderate (11km, 6-7 hours), Day 2 is the most challenging (11km, 7-8 hours, 4,215m summit), Day 3 is longest but downhill (16km, 8-9 hours), and Day 4 starts at 3:30am to reach Machu Picchu for sunrise through the Sun Gate.
Table of Contents
- Overview of the Classic 4-Day Inca Trail
- Pre-Trek Day: Cusco Briefing and Preparation
- Day 1: Km 82 to Ayapata/Wayllabamba (11km)
- Day 2: Climbing to Dead Woman’s Pass (11km)
- Day 3: Two Pass Day to Wiñay Wayna (16km)
- Day 4: Sunrise at Machu Picchu (3km)
- Elevation Profile and Difficulty Analysis
- Campsite Comparison: What to Expect Each Night
- Day-Specific Packing Recommendations
- Weather Variations Throughout the Trek
- Alternative Routes and Campsite Options
Overview of the Classic 4-Day Inca Trail
The 4-day Inca Trail itinerary is the most popular route to Machu Picchu, combining physical challenge with a string of Inca archaeological sites. Managed by Peru’s Ministry of Culture, this protected route requires advance permits and licensed guides, limiting traffic to 500 people per day (including porters and staff).
Route Statistics and Key Facts
Total Distance: 42 kilometers (26 miles) Duration: 4 days, 3 nights Starting Elevation: 2,720m (8,924 ft) at Km 82 Highest Point: 4,215m (13,828 ft) at Dead Woman’s Pass Ending Elevation: 2,430m (7,972 ft) at Machu Picchu Total Ascent: ~2,500m cumulative elevation gain Total Descent: ~3,000m cumulative elevation loss
What Makes This Itinerary Special
The Classic Inca Trail itinerary follows the ancient Qhapaq Ñan road system built by the Inca Empire. Unlike alternative treks, this route provides:
- Archaeological immersion: Pass through 6+ major Inca ruins (Llactapata, Runkurakay, Sayacmarca, Phuyupatamarca, Wiñay Wayna)
- Dramatic arrival: Enter Machu Picchu through the Sun Gate (Inti Punku) at sunrise
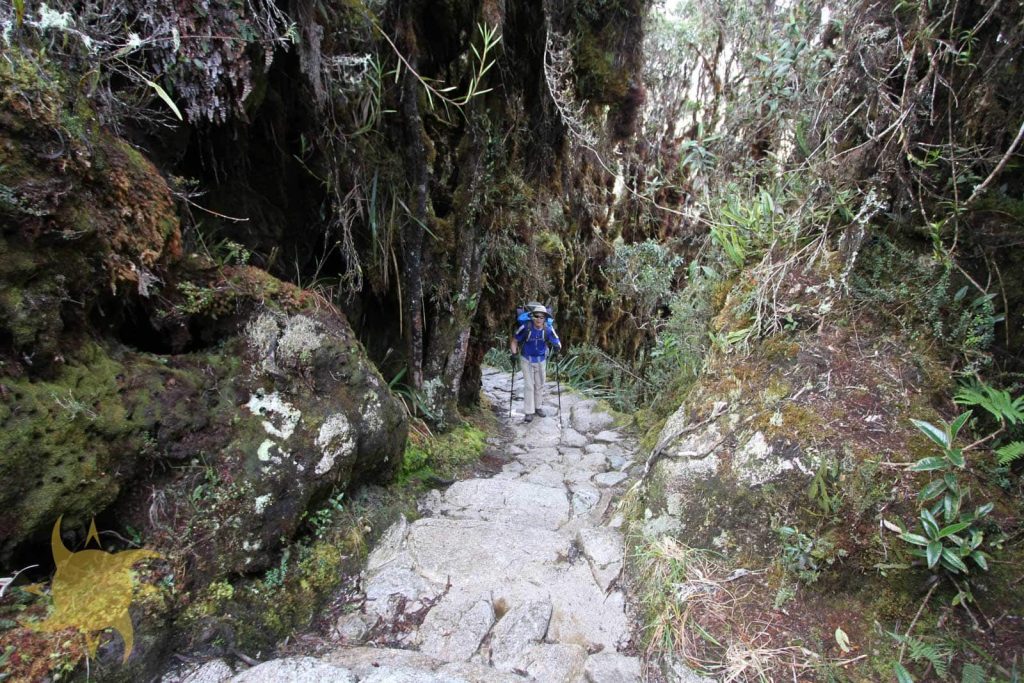
- Ecosystem diversity: Trek through cloud forest, high-altitude puna, subtropical jungle
- Cultural significance: Walk the same stones used by Inca pilgrims 600 years ago
Pro Tip: For most trekkers, the 4-day itinerary is the right balance between challenge and enjoyment. While 2-day and 5-day options exist, the 4-day route allows proper acclimatization while maintaining reasonable daily distances.
Physical Demands and Fitness Requirements
The Inca Trail itinerary requires moderate to high fitness levels:
- Day 1: Moderate warmup (40% difficulty)
- Day 2: Most challenging with 1,200m ascent (85% difficulty)
- Day 3: Longest distance but mostly downhill (70% difficulty)
- Day 4: Easy but very early start (30% difficulty)
Successful completion requires:
- Ability to hike 6-9 hours daily with rest breaks
- Comfort with steep stone staircases (thousands of steps)
- Tolerance for altitude above 4,000m
- Mental preparation for basic camping conditions
Important: At least 2-3 days in Cusco for acclimatization before starting is strongly recommended. Many trekkers experience altitude symptoms without proper adjustment.
Pre-Trek Day: Cusco Briefing and Preparation
Trek Briefing (Evening Before Departure)
We conduct a mandatory briefing meeting 18-24 hours before departure. During this 1-2 hour session, you’ll:
Logistics Covered:
- Meet your guide and fellow trekkers
- Receive detailed day-by-day itinerary review
- Confirm pickup times and departure location
- Submit original passport for permit verification
- Distribute duffel bags for porter-carried equipment
Equipment Checks:
- Sleeping bags (rental or personal)
- Trekking poles inspection
- Headlamp battery testing
- Medication inventory (altitude sickness prevention)
- Final packing list review
Pro Tip: Bring questions about dietary restrictions, medical concerns, or specific fears (altitude, camping, etc.) to this briefing. Guides can adjust plans or provide reassurance based on group needs.
Final Night Preparations
What to Pack in Your Day Pack (8-10kg maximum):
- 2-3 liters water capacity
- Rain jacket and poncho
- Fleece or insulated jacket
- Sun protection (hat, sunglasses, SPF 50+)
- Snacks (energy bars, trail mix, coca candy)
- Personal medications
- Camera and extra batteries
- Toilet paper and hand sanitizer
- Small amount of cash (tip preparation)
What Goes in Your Duffel Bag (Porter-Carried, 7kg maximum):
- Sleeping bag and liner
- Clothing changes for 3 nights
- Toiletries and personal items
- Trekking boots (wear approach shoes on Day 1)
- Extra layers and camp shoes
- Headlamp and battery pack
Important: Porter weight limits are strictly enforced at 7kg per duffel. This protects porter welfare and complies with government regulations. Pack light and wear heaviest items on Day 1.
Night Before Sleep Strategy
- Early dinner: Eat by 7pm for better sleep and early wake-up
- Hydration: Drink 2 liters of water throughout the evening
- Medication: Take first Diamox dose if prescribed (12+ hours before high altitude)
- Sleep target: In bed by 9pm for 5:30am pickup
Day 1: Km 82 to Ayapata/Wayllabamba (11km, 6-7 hours)
Morning: Cusco to Trailhead
5:30am – 6:00am: Hotel pickup in Cusco 6:00am – 8:00am: Scenic drive through Sacred Valley
- Stop in Ollantaytambo for bathrooms and snacks (30 min)
- Views of snowcapped peaks including Veronica (5,750m)
- Final gear distribution and porter organization
8:00am – 8:30am: Arrival at Km 82 checkpoint (Piscacucho)
- Passport and permit verification
- Group photo at Inca Trail entrance sign
- Final bathroom stop (last flush toilets until Aguas Calientes)
Pro Tip: Use the restaurant bathrooms at Km 82 even if you don’t feel the need. The next flush toilets are in Aguas Calientes on Day 4.
For hotel pickup windows by Cusco neighborhood, alternate transport options, and what to have ready the night before, see our Getting to the Inca Trail guide.
Day 1 Trek: Gentle Introduction (2,720m → 3,000m)
8:30am – 10:30am: Km 82 to Llactapata Ruins (2 hours, flat)
The trek begins gently along the Urubamba River with expansive mountain views. This section serves as warmup, allowing your body to adjust to pack weight and altitude.
Highlights:
- Views of snowcapped Veronica across the valley
- First glimpses of Inca agricultural terraces
- Hummingbirds and native flora
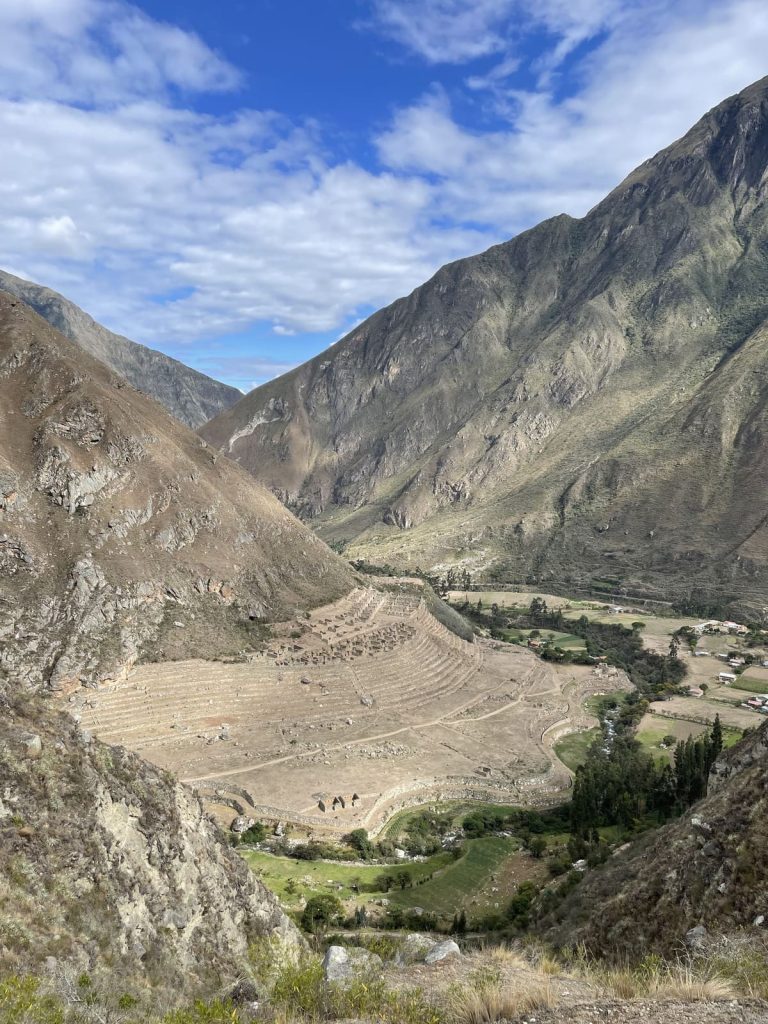
10:30am – 11:30am: Llactapata Archaeological Site Visit (1 hour)
Your first ruin of the trek, Llactapata was an Inca administrative and rest station built under Pachacuti. For the full history, architecture, and site-by-site detail on every ruin along the trail, see our Inca Trail archaeological sites guide.
11:30am – 1:00pm: Lunch Break at Wayraqtambo (1.5 hours)
Your first trail meal sets the pattern for the trek. While you rest, the porter team sets up:
- Dining tent with tables and chairs
- Three-course meal service
- Hot tea, coffee, and filtered water
- Handwashing stations
Typical Day 1 Lunch Menu:
- Soup: Quinoa or vegetable
- Main: Grilled chicken or trout, rice, vegetables
- Dessert: Fresh fruit or pudding
- Drinks: Coca tea, coffee, juice
Pro Tip: Eat even if altitude reduces appetite. Your body needs fuel for the afternoon climb. Coca tea helps with altitude adjustment; drink at least 2 cups.
1:00pm – 4:00pm: Afternoon Ascent to Ayapata/Wayllabamba (3 hours, uphill)
The afternoon brings the first sustained climb, gaining 300m elevation through transitioning cloud forest. This section tests your pacing strategy and reveals how well you’ve acclimatized.
Physical Demands:
- Steady uphill on stone path
- Increasing vegetation as you enter cloud forest
- Noticeable altitude effects for some trekkers
4:00pm – 5:00pm: Arrival at Camp (3,000m)
Your first campsite sits in a valley beneath towering peaks. The porter team has already erected all tents and prepared hot water for washing.
Evening Routine: Day 1 Camp
Camp Facilities:
- Sleeping tents (2-person capacity, single or shared)
- Dining tent with seating
- Kitchen tent (porter area)
- Bathroom tent (basic camping toilet)
- Handwashing station with hot water
4:30pm: Afternoon tea service (popcorn, cookies, hot drinks) 6:00pm: Dinner service (soup, main course, dessert) 7:00pm: Next-day briefing from guide 8:00pm: Lights out (early sleep for challenging Day 2)
Important: Hydrate aggressively on Day 1 evening. Drink 3-4 liters total to prepare for Day 2’s high-altitude challenge. Use your headlamp for nighttime bathroom visits, since camps have no lighting.
Day 1 Packing List Specifics:
- Wear: Moisture-wicking base layers, hiking pants, broken-in boots
- Carry: 2L water, rain jacket, sun hat, sunscreen, camera
- Camp clothes: Kept in duffel bag, fresh layer for sleeping
Day 2: Climbing to Dead Woman’s Pass (11km, 7-8 hours, 3,000m → 3,600m)
The Most Challenging Day of the Inca Trail Itinerary
Day 2 earns its reputation as the toughest segment of the 4-day itinerary. You’ll ascend 1,200 vertical meters to Dead Woman’s Pass (Warmiwañusca) at 4,215m, the highest point of the entire trek. Success requires proper pacing, mental fortitude, and smart energy management.
Morning: Early Start for the Big Climb
5:00am: Wake-up call with hot coca tea delivered to tent 5:30am: Breakfast service (porridge, eggs, toast, fruit, coffee) 6:30am: Begin ascent toward Dead Woman’s Pass
Pro Tip: Eat a substantial breakfast even if appetite is low. Pack extra snacks (chocolate, nuts) for the climb: you’ll need 300-400 calories per hour during the ascent.
First Ascent: Ayapata to Llulluchapampa (2.5 hours)
Distance: 4km Elevation Gain: 400m (3,000m → 3,400m) Difficulty: Moderate-difficult
The morning begins with steady climbing through increasingly sparse vegetation. As you ascend beyond 3,400m, trees disappear and high-altitude grassland (puna) dominates.
Physical Experience:
- Breathing becomes noticeably more difficult
- Pace slows naturally: resist the urge to rush
- Regular 5-minute rest breaks every 20-30 minutes
- Stone steps become steeper and more irregular
Mental Strategy: Focus on “pole-pole” (Swahili for “slowly-slowly”). The fastest trekkers aren’t necessarily first to the top; sustainable pace wins on altitude climbs.
Llulluchapampa: Last Stop Before the Summit (30-45 min break)
This small flat area at 3,750m serves as final rest point before the brutal final push. Most groups stop for:
- Snack and hydration break
- Bathroom stop (last toilet before pass)
- Layer adjustment (mornings are cold, exertion generates heat)
- Mental preparation talk from guides
Important: This is your last chance to refill water bottles from porter supplies. The final 90-minute climb to the pass requires 1 liter minimum per person.
Final Summit Push: Llulluchapampa to Dead Woman’s Pass (90-120 minutes)
Distance: 2km (but feels like 10km) Elevation Gain: 465m (3,750m → 4,215m) Difficulty: Very difficult
This section breaks many trekkers mentally and physically. The final 2 kilometers ascend via endless stone steps with increasingly thin air.
What to Expect:
- Heart rate elevated despite slow pace
- Breathing rate: 2-3 breaths per step
- Mandatory rest breaks every 10-15 minutes
- Altitude headache possible even with acclimatization
- Emotional ups and downs as summit appears closer, then farther
Pacing Strategy From Our Guides:
- Pressure breathing technique: Forcefully exhale to empty lungs completely, allowing full inhale of oxygen-thin air
- Step-breathe-step rhythm: Sync breathing to steps (breath-step-breath-step)
- Focus on 10-step goals: Count to 10 steps, rest 30 seconds, repeat
- Don’t look up: Focus on feet and immediate path, since checking distance to the pass is demoralizing
- Use trekking poles: Transfer 25% of effort from legs to arms
Expert Insight: “The pass doesn’t get closer. You get closer to it. Accept the suffering as temporary. Every single trekker who starts this climb finishes it. You will too.”
Marco, lead Inca Trail guide with 15 years experience
Summit: Dead Woman’s Pass (4,215m / 13,828 ft)
Arrival Time: Typically 11:00am – 1:00pm depending on group pace
The moment you crest the pass delivers overwhelming relief, emotion, and pride. Despite the ominous name (derived from the mountain’s silhouette resembling a supine woman), reaching it means the hardest climb of the trek is behind you.
At the Summit:
- Celebratory group photos with elevation marker
- 15-20 minute rest while waiting for full group
- Snacks and hot tea from support team
- Views back toward Wayllabamba valley and forward to Day 3’s route
Important: Don’t linger too long at the summit. Wind exposure at 4,215m creates dangerous wind chill. After group photo, begin descent immediately to warmer elevation.
Afternoon: Descent to Pacaymayo Camp (1 hour)
Distance: 2.5km downhill Elevation Loss: 615m (4,215m → 3,600m)
The descent to camp provides relief for lungs but punishes knees and quads. Steep stone steps require concentration, and many trekkers slip or twist ankles on this section.
Descent Safety Tips:
- Use trekking poles for knee support (reduces joint stress by 30%)
- Shorten steps on steep sections
- Point toes outward slightly for better ankle stability
- Don’t rush: accidents happen when tired
2:00pm – 3:00pm: Arrival at Pacaymayo Camp and lunch
Camp sits in a protected valley at 3,600m. After the morning’s ordeal, lunch tastes extraordinary. Most trekkers experience enormous appetite return at lower elevation.
Evening: Recovery and Preparation
Day 2 Evening Priorities:
- Rehydrate: Drink 2-3 liters by bedtime
- Stretch: Quads, calves, hip flexors (15 minutes minimum)
- Foot care: Treat any hot spots or blisters before Day 3
- Early sleep: Day 3 is longest distance (16km)
Typical Day 2 Dinner: High-protein recovery meal (steak or chicken, quinoa, vegetables, soup, dessert)
By the Numbers:
- Average summit time: 4-6 hours from morning start
- Success rate: 98% of properly acclimatized trekkers
- Calories burned: 3,500-4,500 for the day
- Water needed: 4-5 liters total
Day 3: Two Pass Day to Wiñay Wayna (16km, 8-9 hours)
The Longest Day with Greatest Archaeological Rewards
Day 3 combines the trek’s longest distance with three major archaeological sites. While you’ll cross two more passes (Runkurakay at 3,970m and Phuyupatamarca at 3,650m), both are much easier than Dead Woman’s Pass.
Morning: Early Start for Long Day
5:30am: Wake-up call 6:00am: Breakfast 7:00am: Begin trek toward Runkurakay Pass
First Section: Pacaymayo to Runkurakay Ruins (2 hours, 3,600m → 3,970m)
The morning ascent gains 370m but feels manageable after crossing Dead Woman’s Pass. Your body has now adapted to altitude, making this climb notably easier than Day 2.
Terrain Characteristics:
- Well-maintained stone path
- Gradual switchbacks through cloud forest
- Increasing humidity as you enter moisture zone
- Orchids, hummingbirds, and dense vegetation
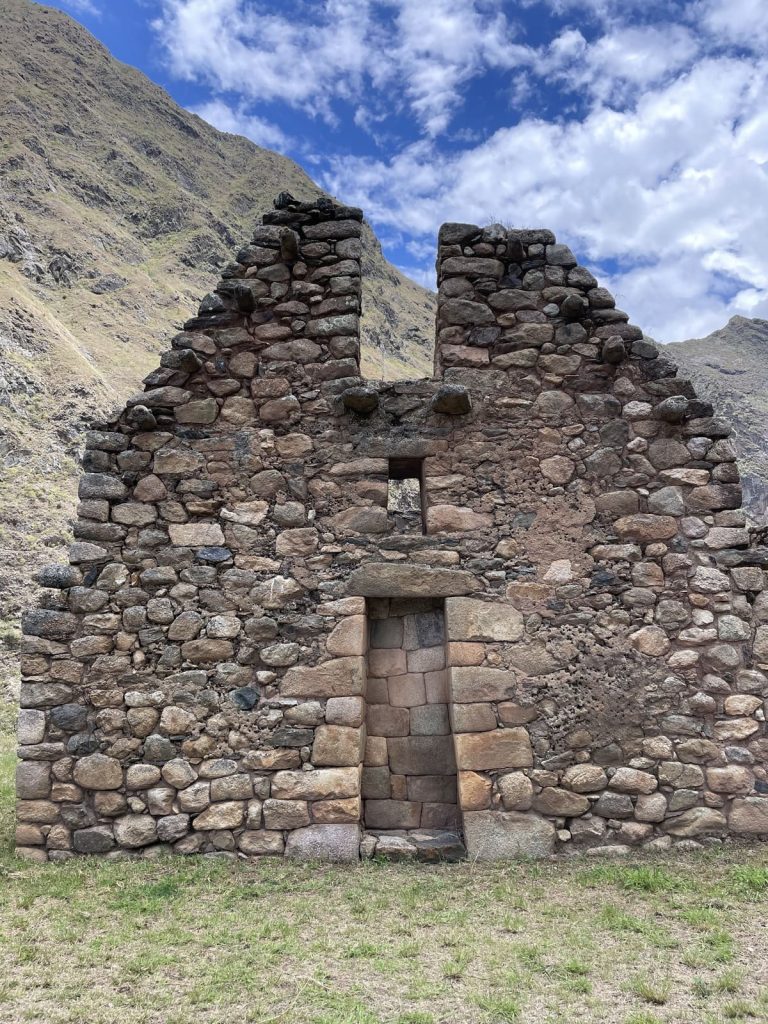
8:45am: Runkurakay Ruins (3,800m), a small circular watchtower rare in Inca architecture, with sweeping views back toward Dead Woman’s Pass. Full site history in our Inca Trail archaeological sites guide.
Runkurakay Pass: Second Highest Point (3,970m)
9:30am: Summit of Runkurakay Pass
At 3,970m, this pass feels easy compared to Day 2. Most groups barely pause before continuing the descent.
Pro Tip: This is the last time you’ll be above 3,900m. Take a moment to appreciate the high-altitude views, since the rest of the trek descends through increasingly lush cloud forest.
Middle Section: Descent to Sayacmarca (1 hour, 3,970m → 3,580m)
10:30am: Sayacmarca Ruins (“Inaccessible Town”)
This cliffside complex, accessible only via a stone staircase, is many trekkers’ favorite ruin on the trail (45-minute guided visit). Full architecture and history in our Inca Trail archaeological sites guide.
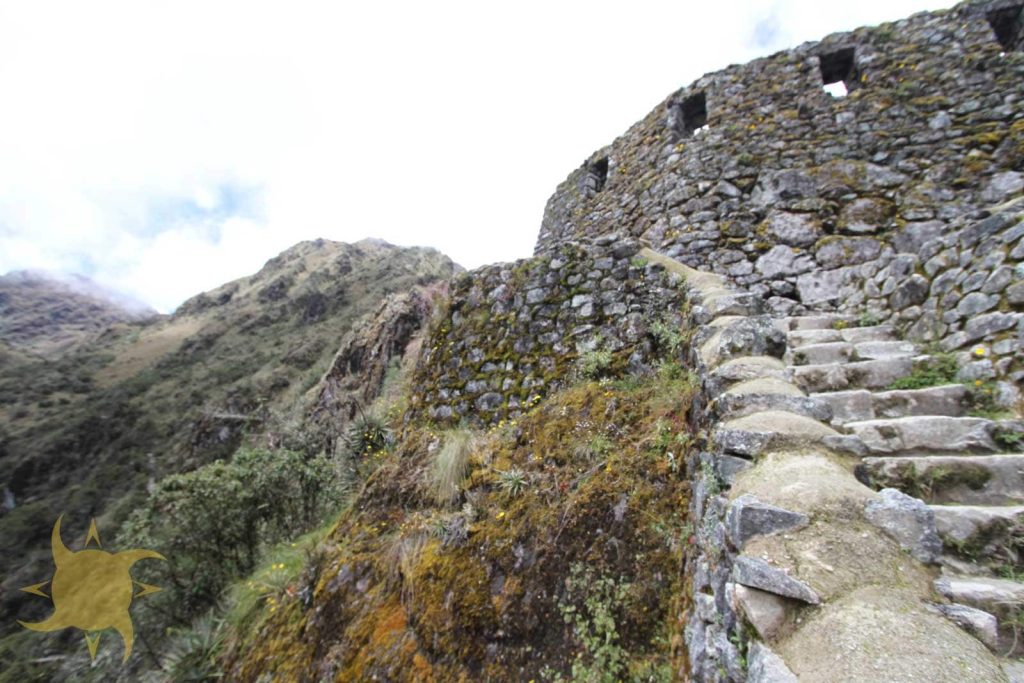
Cloud Forest Tunnel Section: Sayacmarca to Phuyupatamarca (2 hours)
11:30am – 1:30pm: Inca Tunnel and Cloud Forest Immersion
This section takes you through:
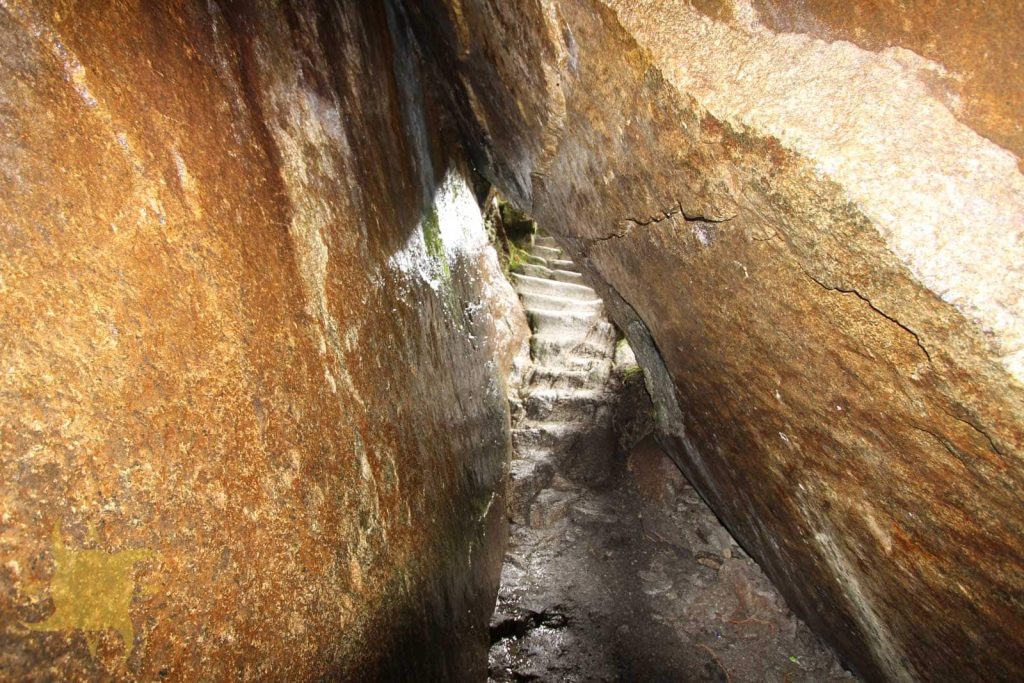
- Inca-carved stone tunnel (bring headlamp)
- Dense cloud forest with moss-covered trees
- Original Inca paving stones (500+ years old)
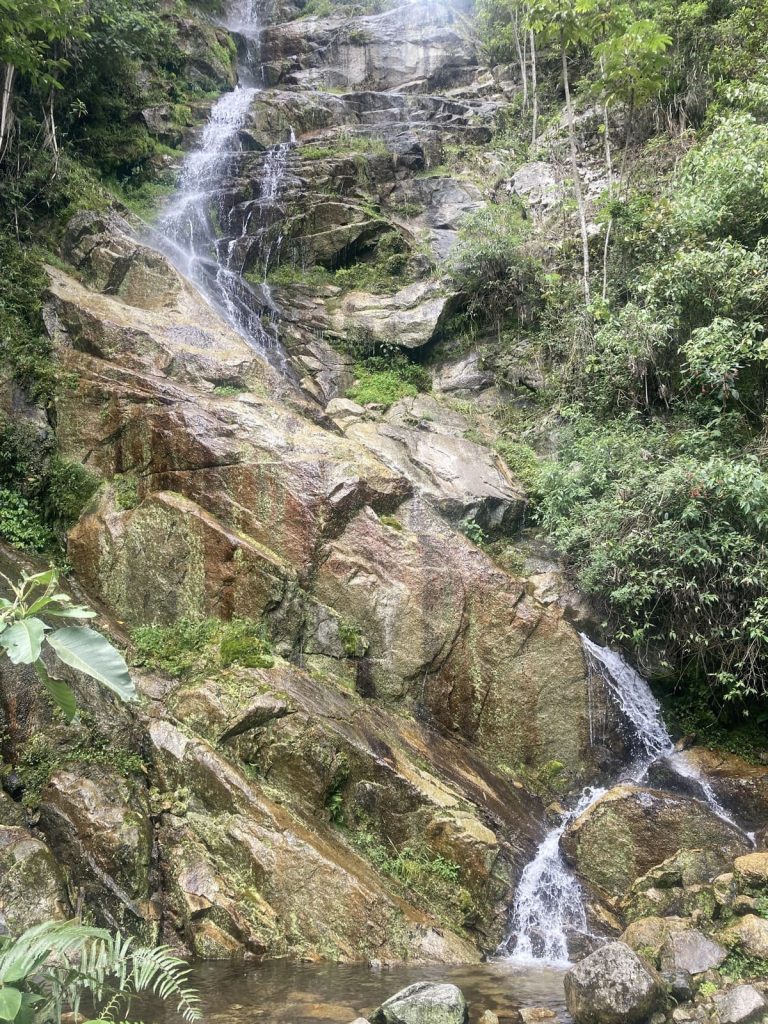
- Waterfalls cascading beside the path
- Rich biodiversity (400+ orchid species, spectacled bears rare but present)
The trail undulates through relatively flat terrain, allowing fast pace and easy conversation. This is often the most enjoyable section of the entire 4-day itinerary: physical effort is low, so you have time to take in the cloud forest.
1:30pm: Lunch Stop Before Phuyupatamarca
Phuyupatamarca: “Town Above the Clouds” (3,650m)
2:30pm: Arrival at Phuyupatamarca Ruins
Phuyupatamarca (“Town Above the Clouds”) is a ceremonial center with six ritual bath platforms and a still-functioning water system, with views extending to the Amazon basin (45-minute visit). Full details in our Inca Trail archaeological sites guide.
Important: The bathrooms at Phuyupatamarca are the last semi-maintained toilets before camp. Use them regardless of need, since the next 2 hours descend 1,200 stone steps.
Infamous Staircase: Phuyupatamarca to Wiñay Wayna (90 minutes)
3:30pm – 5:00pm: The Knee-Killer Descent
From Phuyupatamarca, you’ll descend approximately 1,000 vertical meters via seemingly endless stone staircases. This section earns its reputation as the most knee-punishing segment of the entire Inca Trail itinerary.
What to Expect:
- Continuous steep stone steps (2,000+ individual stairs)
- Slippery when wet: rain makes this treacherous
- Quad and knee burn despite downhill direction
- Mental fatigue from repetitive movement
- Growing anticipation as Wiñay Wayna approaches
Descent Survival Tips:
- Trekking poles essential: Reduce knee stress by 30-40%
- Sideways stepping: Turn sideways on steepest sections to reduce impact
- Frequent micro-breaks: Stop for 30 seconds every 10 minutes to reset form
- Knee braces help: If you have knee issues, wear braces for support
- Focus on form over speed: Sloppy technique causes injury
Expert Insight: “More trekkers injure themselves on Day 3’s descent than on Day 2’s ascent. Don’t let fatigue compromise your technique. It’s okay to be last. It’s not okay to get hurt.”
Carmen, Inca Trail medic with 8 years experience
Wiñay Wayna: Ruins and Final Camp (2,650m)
5:00pm: Arrival at Wiñay Wayna Ruins and Campsite
Wiñay Wayna (“Forever Young”) is the trail’s largest agricultural and ceremonial complex, with terraced fields and a still-functioning water system. Full history in our archaeological sites guide. It’s also the trail’s biggest, most developed campsite, with semi-flush toilets, a cold shower, and a small shop. See our Inca Trail camping guide for what to expect at all three campsites.
Evening: Final Night Before Machu Picchu
6:00pm: Dinner service and celebration
The final dinner carries celebratory atmosphere. Many groups:
- Share favorite moments from the trek
- Thank porter team (tip distribution)
- Receive Machu Picchu entry tickets and train tickets
- Review Day 4 logistics (3:30am wake-up)
Day 4 Briefing Covers:
- 3:30am wake-up call
- 4:00am breakfast (light)
- 4:30am departure in darkness
- 5:30am Sun Gate arrival goal (if timed correctly)
- 7:00am Machu Picchu entry
- 2:00pm train departure to Cusco
Pro Tip: Set multiple alarms for 3:15am. Missing wake-up call means missing sunrise at Sun Gate, the emotional pinnacle of the entire 4-day itinerary.
Evening Priorities:
- Shower: Cold but worth it (final shower until Cusco)
- Charge devices: Limited outlets available
- Pack completely: Everything must be ready by 4:30am
- Sleep by 8pm: You need 7 hours before 3:30am wake-up
Day 3 By the Numbers:
- Distance: 16km (longest day)
- Elevation gain: 370m
- Elevation loss: 1,320m
- Archaeological sites: 3 major ruins
- Stone steps descended: ~2,000
- Calories burned: 3,000-4,000
Day 4: Sunrise at Machu Picchu (3km, 2 hours)
The Emotional Finale: Sun Gate to Machu Picchu
After three days of physical effort, you’ll enter Machu Picchu through the Sun Gate (Inti Punku) at sunrise, the same way Inca pilgrims arrived 600 years ago. The hiking itself is short and easy.
Pre-Dawn Wake-Up and Checkpoint Strategy
3:15am: Wake-up call (self-alarm as backup) 3:30am: Light breakfast (coffee, cookies, fruit; full breakfast after Machu Picchu visit) 4:00am: Pack final items and head to checkpoint
The Checkpoint Queue: First-in-Line Strategy
4:30am – 5:30am: Waiting at Inca Trail Checkpoint
The checkpoint opens at 5:30am sharp, and your position in queue determines your Sun Gate arrival time. Most tour groups wake early to secure front positions, creating a competitive rush.
Checkpoint Logistics:
- Gate opens exactly at 5:30am (rangers are punctual)
- First 50 people through reach Sun Gate for sunrise
- Groups after 6:00am miss optimal sunrise light
- Passport verification required before entry
- No bathrooms available at checkpoint
Important: The checkpoint line forms in complete darkness with headlamps only. Bring:
- Headlamp with fresh batteries
- Warm layers (2,650m altitude = cold predawn)
- Rain jacket (morning mist is common)
- Camera ready for instant sunrise photos
The Final Ascent: Wiñay Wayna to Sun Gate (1 hour)
5:30am – 6:30am: Predawn Hike Through Cloud Forest (2.5km)
Once through the checkpoint, you’ll power-hike toward the Sun Gate. Most trekkers practically run this section, energized by adrenaline and the prospect of finally reaching Machu Picchu.
Trail Characteristics:
- Stone steps ascending through cloud forest
- Mostly stairs (both up and level sections)
- Narrow path (single file required)
- Predawn darkness transitioning to blue hour
- Growing anticipation with each switchback
Physical Effort: Moderate (elevated heart rate but manageable after three days of conditioning)
Pro Tip: Don’t sprint to Sun Gate. A sustainable fast pace works better than exhausting yourself in the first 15 minutes. Most groups arrive within 10-15 minutes of each other regardless of starting position.
Sun Gate (Inti Punku): The Sacred Entrance (2,720m)
6:30am – 7:00am: Sunrise at Sun Gate
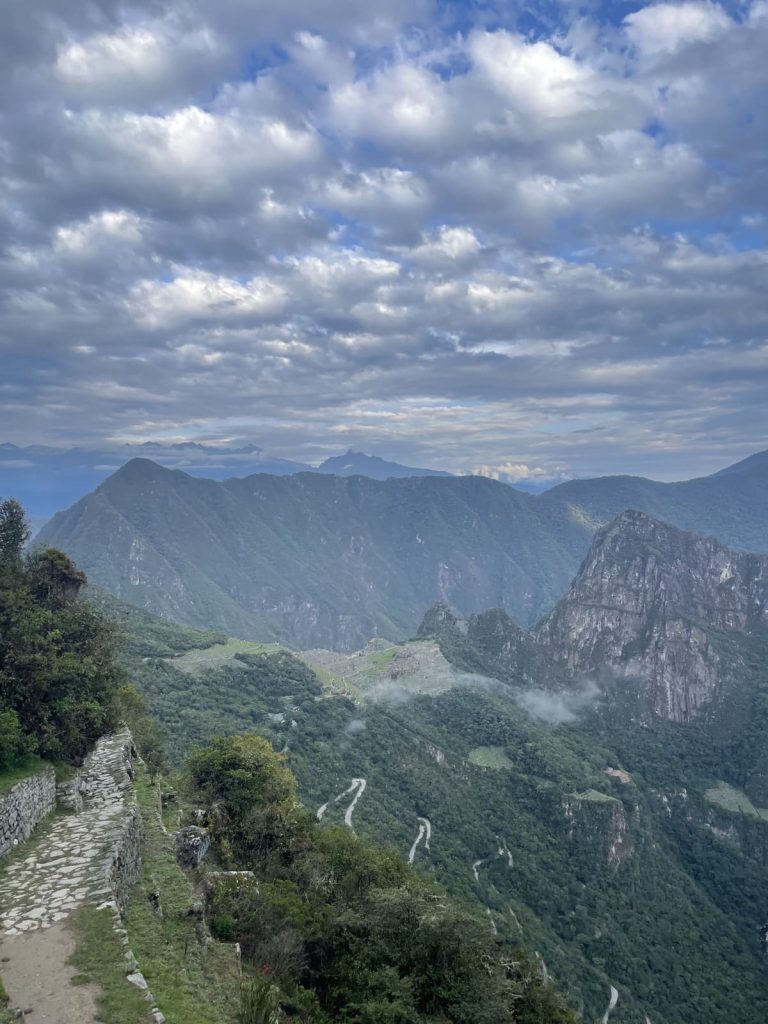
Rounding the final corner to reveal Machu Picchu through the Sun Gate delivers an overwhelming rush of emotion. Many trekkers cry, cheer, or sit silently processing the magnitude of this moment.
What You’ll Experience:
If weather cooperates and timing is right:
- First glimpse of Machu Picchu as sunrise illuminates the citadel
- Huayna Picchu mountain rising behind the ruins
- Morning mist creating ethereal atmosphere
- 360-degree panoramic views of Urubamba valley
- Shared celebration with fellow trekkers
Photo Opportunities:
- Classic framed view of Machu Picchu through stone gateway
- Group photo with Machu Picchu backdrop
- Silhouette shots with sunrise light
- Time-lapse of mist clearing over ruins
Weather Reality Check: Only 40-50% of groups experience clear sunrise conditions. Cloud cover, fog, or rain are common even in dry season. If conditions are poor, don’t despair: the full guided tour of the citadel still lies ahead.
Time at Sun Gate: 15-30 minutes
After group photos and personal reflection, you’ll begin the final descent toward Machu Picchu citadel.
Final Descent: Sun Gate to Machu Picchu Entrance (45 minutes)
7:00am – 7:45am: The Last Kilometer
The trail descends gradually through agricultural terraces with continuously improving views of Machu Picchu. This section allows you to process the accomplishment while anticipating entry into the ruins themselves.
Path Details:
- Well-maintained stone path
- Multiple photo viewpoints
- Agricultural terraces with llamas
- Meeting point where trail converges with bus route
- Final checkpoint before citadel entrance
Entering Machu Picchu: The Guided Tour
8:00am – 10:30am: Full Guided Tour of Machu Picchu
Your guide leads a 2-2.5 hour tour covering:
Main Sectors:
- Agricultural sector with terraces
- Urban sector with temples and residences
- Royal sector with Palace of the Inca
- Sacred Plaza and Temple of the Three Windows
- Intihuatana ritual stone
- Temple of the Sun
- Sacred Rock
Tour Highlights:
- Detailed history of Machu Picchu construction (1450-1460)
- Architectural engineering explanations
- Astronomical alignment theories
- Water distribution system
- Abandonment theories and Spanish conquest context
- Modern rediscovery by Hiram Bingham (1911)
Pro Tip: After the guided tour ends, you’re free to explore independently until your ticket time expires (usually 4 hours total). Popular add-ons include hiking Huayna Picchu or Machu Picchu Mountain (requires separate permit booked months in advance).
Post-Tour: Aguas Calientes and Return to Cusco
11:00am – 12:30pm: Bus to Aguas Calientes and Lunch
After Machu Picchu exploration:
- 30-minute bus ride down switchbacks to Aguas Calientes
- Free time in town (hot springs, souvenir shopping, celebratory drinks)
- Lunch at local restaurant (usually included in tour)
- Final bathroom and shower opportunities
2:00pm – 6:00pm: Train Return to Cusco
Train Journey:
- 2:00pm – 3:45pm: PeruRail or Inca Rail to Ollantaytambo (1h 45min)
- 4:00pm – 6:00pm: Bus from Ollantaytambo to Cusco (2 hours)
- 6:00pm+: Hotel drop-off and celebration
Most trekkers sleep during the train ride, exhausted but fulfilled.
Day 4 By the Numbers:
- Distance: 3km (shortest day)
- Elevation change: Minimal (2,650m to 2,430m)
- Physical difficulty: Easy
- Wake-up time: 3:15am
- Machu Picchu arrival: 7:00am – 8:00am
Expert Insight: “Day 4 is why we do the Inca Trail. That moment at Sun Gate when Machu Picchu appears, after three days of doubt, pain, and determination, validates everything. Every trekker who arrives there understands they’ve accomplished something profound.”
Santiago, senior Inca Trail guide with 12 years experience
Elevation Profile and Difficulty Analysis
Complete 4-Day Elevation Chart and Physical Demands
The 42km route includes approximately 2,500m cumulative ascent and 3,000m cumulative descent, with altitudes ranging from 2,400m to 4,215m.
Day-by-Day Elevation Breakdown
Day 1: Gentle Introduction
- Starting elevation: 2,720m (Km 82)
- Ending elevation: 3,000m (Wayllabamba)
- Total gain: 280m
- Total loss: Minimal
- Difficulty rating: 3/10
Day 2: Maximum Altitude Challenge
- Starting elevation: 3,000m (Wayllabamba)
- Peak elevation: 4,215m (Dead Woman’s Pass)
- Ending elevation: 3,600m (Pacaymayo)
- Total gain: 1,215m
- Total loss: 615m
- Difficulty rating: 9/10
Day 3: Distance and Archaeological Day
- Starting elevation: 3,600m (Pacaymayo)
- Peak elevation: 3,970m (Runkurakay Pass)
- Ending elevation: 2,650m (Wiñay Wayna)
- Total gain: 370m
- Total loss: 1,320m
- Difficulty rating: 7/10
Day 4: Emotional Finale
- Starting elevation: 2,650m (Wiñay Wayna)
- Peak elevation: 2,720m (Sun Gate)
- Ending elevation: 2,430m (Machu Picchu)
- Total gain: 70m
- Total loss: 290m
- Difficulty rating: 2/10
Altitude Physiology and Acclimatization
Oxygen Availability by Elevation:
- Sea level: 100% oxygen saturation
- 3,400m (Cusco): 66% oxygen availability
- 3,000m (Day 1 camp): 68% oxygen availability
- 4,215m (Dead Woman’s Pass): 58% oxygen availability
Physiological Effects:
- Below 3,000m: Most people asymptomatic
- 3,000m – 4,000m: Noticeable breathing difficulty, reduced endurance
- Above 4,000m: Significant cardiovascular stress, potential altitude sickness symptoms
Pro Tip: Spending 2-3 days in Cusco (3,400m) before starting the trek allows partial acclimatization, making Day 2’s high-altitude climb significantly more manageable.
Difficulty Factors Beyond Elevation
Terrain Challenges:
- Stone staircases: 5,000+ individual steps throughout the trek
- Uneven surfaces: Original Inca paving with irregular step heights
- Weather variability: Rain, cold, intense sun within single day
- Pack weight: 8-10kg day pack for 6-9 hours daily
Mental Challenges:
- Sleep quality: Camping at altitude reduces sleep quality
- Cumulative fatigue: Each day builds on previous day’s effort
- Altitude psychology: Thin air affects mood and motivation
- Monotonous ascents: Mental fortitude required for endless stairs
Fitness Level Requirements
Minimum Fitness Standard:
- Hike 6-7 hours with pack weight
- Climb 1,000+ vertical meters in single day
- Tolerate consecutive high-effort days
- Manage altitude above 4,000m
Recommended Training:
- 8-12 weeks hiking preparation
- 2-3 cardio sessions weekly (running, cycling, swimming)
- Stair climbing with 10kg pack
- Long-distance day hikes (15-20km)
Important: No amount of fitness compensates for inadequate acclimatization. Sea-level athletes often struggle more than moderately-fit but well-acclimatized trekkers.
Campsite Comparison: What to Expect Each Night
The three campsites vary considerably in elevation, comfort, and facilities. For full detail on gear, sleep strategy, and what each night is really like, see our Inca Trail camping guide.
Night 1: Wayllabamba or Ayapata (3,000m): comfortable mid-altitude sleeping in a river valley, basic toilet tents, 5-10°C overnight.
Night 2: Pacaymayo or Chaquicocha (3,600m): the coldest and highest camp (1-5°C), where altitude commonly disrupts sleep.
Night 3: Wiñay Wayna (2,650m): the largest, most developed campsite, with semi-flush toilets, a cold shower (5 soles), and a small shop.
Campsite Comparison Table
| Feature | Wayllabamba | Pacaymayo | Wiñay Wayna |
|---|---|---|---|
| Elevation | 3,000m | 3,600m | 2,650m |
| Crowd Level | Medium | Low | High |
| Facilities | Basic | Basic | Semi-developed |
| Toilet Type | Pit toilet tent | Pit toilet tent | Semi-flush toilets |
| Shower Available | No | No | Yes (cold, 5 soles) |
| Shop Available | No | No | Yes |
| Sleep Comfort | Good | Poor (altitude) | Best |
| Temperature | 5-10°C | 1-5°C | 10-15°C |
| Tent Platform | Grass/dirt | Mixed | Concrete platforms |
Day-Specific Packing Recommendations
Smart Packing Strategy for Each Day’s Unique Demands
The 4-day Inca Trail requires different gear and clothing priorities each day based on elevation, weather, and physical demands. Smart packing means organizing your day pack and duffel bag for quick access to day-specific items.
Day 1 Packing: Comfort and Break-In
Day 1 Priorities:
- Break in your body without breaking your feet
- Test clothing layers and pack organization
- Stay comfortable during warmup day
Day Pack Essentials (8kg maximum):
- 2L water (you’ll drink it all)
- Rain jacket (afternoon showers common)
- Sun protection: Hat, sunglasses, SPF 50+
- Light fleece (for breaks at shade spots)
- Snacks (trail mix, energy bars, fruit)
- Camera with extra battery
- First aid kit: Blister prevention, pain relievers
- Toilet paper and hand sanitizer
- Cash (50-100 soles for tips, emergencies)
Clothing to Wear:
- Moisture-wicking base layer (never cotton)
- Hiking pants or convertible pants
- Well-broken-in hiking boots
- Hiking socks (merino wool preferred)
- Light long-sleeve sun shirt
Pro Tip: Day 1 is your equipment shakedown. If boots cause hot spots, boots feel uncomfortable, or pack weight distribution feels wrong, address it immediately at lunch break or in camp. Day 2 is unforgiving to equipment issues.
Day 2 Packing: Layering for Extreme Altitude
Day 2 Priorities:
- Manage temperature extremes (cold morning, hot exertion, cold summit, warm afternoon)
- Bring extra snacks for 8+ hour effort
- Prepare for potential altitude sickness
Critical Day 2 Items:
- 3L water capacity (you’ll refill at Llulluchapampa)
- Multiple layering options
- High-calorie snacks (chocolate, nuts, dried fruit)
- Altitude medication (Diamox, ibuprofen)
- Lip balm with SPF (intense UV at 4,200m)
- Electrolyte supplements
- Blister treatment supplies
- Trekking poles (essential for descent)
Layering System for Day 2:
Morning Start (Cold, 3,000m):
- Base layer top
- Insulating fleece or down jacket
- Rain jacket as windbreaker
- Warm hat and gloves
Ascending to Pass (Hot from Exertion):
- Base layer only
- Sun hat
- Sunglasses
At Summit (Cold, Windy, 4,215m):
- All layers back on
- Windproof jacket critical
- Gloves and hat essential
Afternoon Descent (Warm):
- Back to minimal layers
- Focus on knee support (poles, braces)
Important: Pack layers in accessible locations. Stopping to dig through your pack to find a jacket wastes time and energy. Use pack top pocket or side pockets for frequently-accessed items.
Day 3 Packing: Endurance and Foot Care
Day 3 Priorities:
- Prepare for 8-9 hours and 16km distance
- Serious knee support for massive descent
- Extra foot care supplies
Day 3 Specific Needs:
- Trekking poles (non-negotiable for 2,000 stair descent)
- Knee braces if you have knee issues
- Extra blister treatment and foot tape
- More snacks than Day 1 or 2
- 3L water capacity
- Headlamp (backup for Day 4 predawn hike)
- Rain gear (afternoon storms common at elevation)
Foot Care Priority:
By Day 3, any minor foot issues become major problems:
- Hot spots become blisters
- Blisters become open sores
- Toe pressure from descent causes blackened toenails
Foot Care Checklist:
- Moleskin or blister bandages
- Athletic tape for toe protection
- Second pair of socks (mid-day change improves comfort)
- Toenail protection (tape toes before descent)
- Pain relievers (ibuprofen for inflammation)
Pro Tip: Change socks during lunch break on Day 3. Fresh, dry socks dramatically reduce blister risk during the long afternoon descent.
Day 4 Packing: Minimal Load for Easy Day
Day 4 Priorities:
- Pack light (only 3km of hiking)
- Keep valuables secure at Machu Picchu
- Bring Machu Picchu entry requirements
Minimal Day 4 Pack:
- 1L water (adequate for 2 hours)
- Light rain jacket
- Warm layer for predawn wait at checkpoint
- Headlamp with fresh batteries
- Camera and phone (fully charged)
- Snacks for Machu Picchu tour
- Sunscreen and hat (intense sun at ruins)
- REQUIRED: Original passport (Machu Picchu entry requirement)
- Small daypack or packable bag for Machu Picchu (large packs not allowed inside)
What to Leave at Wiñay Wayna Camp:
Your main duffel bag and non-essential items stay at camp while you hike to Machu Picchu. Porters pack everything and transport it to Aguas Calientes, where you reunite after the Machu Picchu tour.
Can Leave Behind:
- Sleeping bag
- Extra clothing
- Toiletries
- Trekking poles (not allowed in Machu Picchu)
- Large backpack (>25L not allowed)
Critical: Keep passport in waterproof bag. Machu Picchu entry is denied without original passport matching your entry ticket.
Weight Distribution: Duffel Bag vs Day Pack
Duffel Bag (Porter-Carried, 7kg Maximum):
- Sleeping bag and liner (2kg)
- Clothing changes (1.5kg)
- Toiletries (0.5kg)
- Extra shoes/camp shoes (1kg)
- Trekking poles at night (1kg)
- Personal items (1kg)
Day Pack (You Carry, 8-10kg Maximum):
- Water (2-3kg depending on day)
- Snacks and lunch (0.5kg)
- Clothing layers (1-2kg)
- Camera and electronics (1kg)
- Rain gear (0.5kg)
- First aid and toiletries (0.5kg)
- Miscellaneous (1kg)
Pro Tip: Many trekkers overpack clothing. You only need: 2 hiking outfits (wear one, carry one), 1 camp outfit, 3 underwear, 3 pairs socks. Laundry facilities don’t exist on trail, so embrace the grime.
Weather Variations Throughout the Trek
Microclimate Zones and Seasonal Weather Patterns
The Inca Trail passes through three distinct climate zones over just 42 kilometers, creating dramatic weather variability within single days. Understanding these microclimates helps you pack appropriately and set realistic expectations.
Climate Zones of the Inca Trail
Zone 1: Montane Shrubland (Km 82 to Wayllabamba, 2,700m-3,000m)
- Climate: Warm days, cool nights
- Vegetation: Sparse shrubs, grassland, some eucalyptus
- Weather: Sunny with occasional afternoon clouds
- Temperature: 20-25°C day, 5-10°C night
Zone 2: High Puna (Wayllabamba to Dead Woman’s Pass, 3,000m-4,215m)
- Climate: Cold, intense UV, rapid weather changes
- Vegetation: Alpine grasses, minimal tree cover
- Weather: Morning sun transitions to afternoon storms
- Temperature: 15-20°C day, 0-5°C night (freezing possible at pass)
Zone 3: Cloud Forest (Runkurakay to Wiñay Wayna, 3,900m-2,650m)
- Climate: Humid, misty, frequent precipitation
- Vegetation: Dense jungle, moss-covered trees, orchids
- Weather: Morning fog, afternoon rain showers
- Temperature: 18-22°C day, 10-15°C night
Seasonal Weather Patterns (Month-by-Month)
Dry Season: May through September
Best weather conditions for the Inca Trail:
- May-June: Post-rainy season, lush green landscapes, moderate crowds
- July-August: Peak season, driest months, highest crowds, brown vegetation
- September: Shoulder season, good weather, moderate crowds, wildflowers blooming
Average Dry Season Conditions:
- Rainfall: 0-3 days rain per week
- Daytime temperature: 20-25°C at low elevation, 5-15°C at high passes
- Night temperature: 5-10°C at camps
- Clear sky probability: 70-80%
Wet Season: November through March
Challenging but viable conditions:
- November-December: Transition season, afternoon storms daily
- January-February: Peak rainy season, trail closed in February for maintenance
- March: Transition back to dry, improving conditions
Average Wet Season Conditions:
- Rainfall: 5-7 days rain per week
- Daytime temperature: Similar to dry season
- Night temperature: 5-10°C (slightly warmer due to cloud cover)
- Clear sky probability: 20-40%
Important: February is official trail closure month for maintenance. No permits are issued. This protects the trail from erosion during peak rainy season.
Daily Weather Patterns (Typical Day)
Morning (5am-11am):
- Clear skies and cold temperatures
- Minimal precipitation
- Best hiking conditions
- Excellent visibility for photography
Midday (11am-2pm):
- Warming temperatures
- Cloud formation begins
- UV intensity peaks
- Increasing wind at high elevations
Afternoon (2pm-6pm):
- Cloud buildup completes
- Rain showers likely (even in dry season)
- Temperature drops
- Reduced visibility
Evening/Night (6pm-5am):
- Rain usually clears
- Temperature drops significantly
- Clear skies return
- Frost possible above 3,500m
Pro Tip: Even in dry season, afternoon rain showers are common. Pack rain gear in accessible location every morning, regardless of clear skies at departure.
Weather-Specific Packing Strategies
For Dry Season Treks (June-August):
- Sun protection priority (UV is intense at altitude)
- Lightweight rain jacket (sudden storms still occur)
- Warm sleeping bag (cold nights)
- Moisture-wicking clothing (daytime heat)
For Wet Season Treks (November-January):
- Heavy-duty rain jacket and pants
- Waterproof pack cover or dry bags
- Extra clothing changes (everything gets wet)
- Waterproof boots or gaiters
- Warmer sleeping bag (humidity reduces warmth)
Microclimate Temperature Extremes
Coldest Point: Dead Woman’s Pass summit at dawn (Day 2)
- Temperature: -5°C to +5°C
- Wind chill: -10°C to 0°C
- Feels like: Freezing
Warmest Point: Midday on Day 1 in direct sun
- Temperature: 25-30°C
- UV index: Extreme (11+)
- Feels like: Hot desert
Temperature Range in Single Day: 35°C differential possible
This extreme variability requires layering system that accommodates:
- Freezing morning conditions
- Hot exertion during climbs
- Cold summit conditions
- Warm afternoon descent
Weather Impact on Experience
Clear Weather Benefits:
- Mountain views throughout trek
- Sunrise at Sun Gate with Machu Picchu visible
- Easier footing on dry trails
- Better photography opportunities
- Higher morale and enjoyment
Rainy Weather Challenges:
- Slippery stone steps (safety hazard)
- Limited mountain views
- Wet camping conditions
- Cold and discomfort
- Fog obscures Machu Picchu at sunrise
Expert Insight: “Weather is the one variable you cannot control. I’ve guided 200+ treks, and some of my favorite memories are from rainy season trips where groups bonded through adversity. Clear weather is preferred, but bad weather creates character and stories.”
Miguel, senior Inca Trail guide
Weather Statistics:
- Probability of zero rain: 45% (dry season), 5% (wet season)
- Average rain days per trek: 1-2 (dry season), 3-4 (wet season)
- Sunrise visibility at Sun Gate: 60% (dry season), 30% (wet season)
Alternative Routes and Campsite Options
Variations in the 4-Day Inca Trail Itinerary
While the basic 4-day structure remains consistent, several route variations and alternative campsites exist based on our route planning, permit availability, and group fitness levels. Understanding these options helps you evaluate the route variations available on your trek.
Primary Campsite Alternatives
Night 1 Options:
- Wayllabamba (3,000m): Standard campsite, lower elevation
- Ayapata (3,300m): Higher alternative, shorter Day 2 but harder Day 1
Ayapata Pros:
- Reduces Day 2 ascent by 300m
- Better acclimatization at higher elevation
- Less crowded than Wayllabamba
Ayapata Cons:
- Harder Day 1 with steeper afternoon climb
- More altitude exposure on first night
- Smaller campsite with limited facilities
Night 2 Options:
- Pacaymayo (3,600m): Standard campsite after Dead Woman’s Pass
- Chaquicocha (3,650m): Slightly higher, adds 30 minutes to Day 2
Night 3 Options:
- Wiñay Wayna (2,650m): Standard large campsite
- Phuyupatamarca (3,650m): Rare alternative, very small capacity
Why Wiñay Wayna Dominates Night 3:
- Closest legal campsite to Machu Picchu (only 2 hours)
- Allows reasonable 3:30am wake-up for sunrise
- Better facilities than Phuyupatamarca
- Lower elevation improves sleep quality before summit day
Distance Distribution Variations
Standard Distribution:
- Day 1: 11km
- Day 2: 11km
- Day 3: 16km
- Day 4: 3km
Aggressive Distribution (Experienced/Fast Groups):
- Day 1: 15km (push to Ayapata)
- Day 2: 13km (reach Chaquicocha)
- Day 3: 14km (shorter)
- Day 4: 3km
Conservative Distribution (Slower/Older Groups):
- Day 1: 10km (stop early at lower Wayllabamba)
- Day 2: 10km (short day after pass)
- Day 3: 18km (longer but mostly downhill)
- Day 4: 3km
Alternative Start Points
Km 82 (Piscacucho): Standard 4-day starting point (42km total)
Km 88 (Qorihuayrachina): Alternative start used when Km 82 has access issues
- Adds 2km to total distance (44km)
- Slightly different Day 1 scenery
- Same overall route after convergence
Pro Tip: Confirm which kilometer marker we use for departure. This affects total distance and Day 1 duration.
Acclimatization Add-Ons
5-Day Inca Trail Option:
Some operators offer a 5-day itinerary that splits Day 2:
- Extra day allows gradual ascent to Dead Woman’s Pass
- Intermediate camp at Llulluchapampa (3,750m)
- Reduces risk of altitude sickness
- Adds cost but significantly improves comfort
5-Day Itinerary Breakdown:
- Day 1: Km 82 to Wayllabamba (11km)
- Day 2: Wayllabamba to Llulluchapampa (4km, gentle climb)
- Day 3: Llulluchapampa to Dead Woman’s Pass to Pacaymayo (7km)
- Day 4: Same as standard Day 3 (16km)
- Day 5: Same as standard Day 4 (3km)
Who Should Consider 5-Day Trek:
- Trekkers with minimal high-altitude experience
- Older hikers (60+) or those with health concerns
- Groups wanting more relaxed pace with more archaeological time
- Anyone willing to pay extra for comfort
Speed Variations: Fast vs Slow Groups
Fast Groups (Over the Day 2 Pass by 11am):
- Early daily starts (6:00am)
- Shorter breaks
- Faster hiking pace
- Reach campsites by 3-4pm
- More free time in evenings
Slow Groups (Over the Day 2 Pass by 1-2pm):
- Later starts (7:00am)
- Extended breaks
- Comfortable pace
- Reach campsites by 5-6pm
- Less evening free time
Neither is better; fast groups aren’t necessarily more enjoyable. Slower pace allows more time at archaeological sites and reduces injury risk.
Permit-Driven Route Flexibility
Campsite assignments are determined by permit allocation:
- We request preferred campsites when booking permits
- Government assigns based on availability and capacity limits
- We adapt the itinerary based on assigned campsites
Important: Confirmed itinerary (specific campsites) isn’t finalized until permits are issued 6-8 months before trek. Book early to secure preferred campsite permits.
Conclusion
Key Takeaways:
- Day 2 is the defining challenge: The 1,200m ascent to Dead Woman’s Pass tests every trekker, but proper pacing and mental preparation lead to 98% success rates
- Acclimatization is non-negotiable: Spend 2-3 days in Cusco before starting to significantly improve your experience and reduce altitude sickness risk
- Campsite comfort varies dramatically: Night 2 at Pacaymayo is coldest and most uncomfortable, while Night 3 at Wiñay Wayna offers the best facilities
- Weather unpredictability requires flexibility: Pack for all conditions including rain, cold, and intense sun within single days
- The Sun Gate arrival makes everything worthwhile: Entering Machu Picchu at sunrise after four days of effort creates the emotional high point of the trek
Next step: review our itineraries and campsite options, and book your permits 6-8 months in advance for peak season dates. For permits, costs, training and packing, see our Inca Trail resource hub.
Related Articles
- Inca Trail Permit Availability
- Best Time to Hike the Inca Trail Isn’t Always June
- Inca Trail Cost 2026: $600 to $4,000, Broken Down by Tier
- Is the Inca Trail Safe? Altitude, Injuries, Evacuation & Insurance
- 20 Inca Trail Tips for First-Time Hikers (500+ Trekkers)
- Inca Trail Packing List 2026: 27 Essentials Under 7kg
- Inca Trail Training Plan: 12 Weeks to Dead Woman’s Pass
- How Inca Trail Permits Work
- Inca Trail 4 Days: Classic Trek to Machu Picchu
- Classic Inca Trail: Route Data & Elevation Profile
About This Guide: This Inca Trail itinerary guide was last updated on August 4, 2026, and reviewed by experienced Inca Trail guides with 10+ years leading treks. Trail conditions, campsite assignments, and regulations can change, so always verify current information with us and check official updates from Peru’s Ministry of Culture.